12 Oct Live Siltation 101
 Hey Everybody,
We’re thinking of doing a series of posts about different Erosion & Sediment Control and various Streambank techniques. Kind of a basic knowledge, information-rich, get-to-know-your-tools type of thing. So, let’s give it a go shall we?
Let’s talk Live Silitation!
TWO QUICK NOTES
- The above video clip is a part of our Willow Creek Project DVD. Would you like to use Dirt Time video in your training or presentations. Get it touch with us here.
- All of this information below is taken from, and is covered in more depth, in our Erosion Software program ESENSS (check it out here).
DESCRIPTION
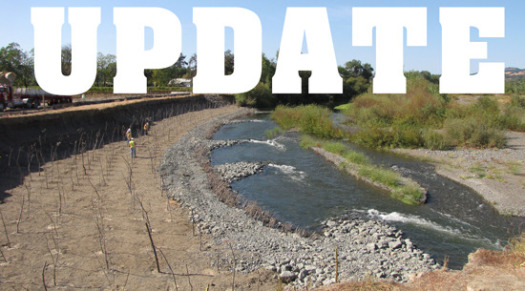
Live siltation (also known as Vertical Brush Layering) is a revegetation technique used to secure the toe of a streambank, trap sediments, and create fish rearing habitat. The system can be constructed as a living or a non-living brushy system at the water’s edge.
PURPOSE
Live siltation helps to secure the toe of a streambank, and trap sediments.
CONDITIONS WHERE PRACTICE APPLIES:
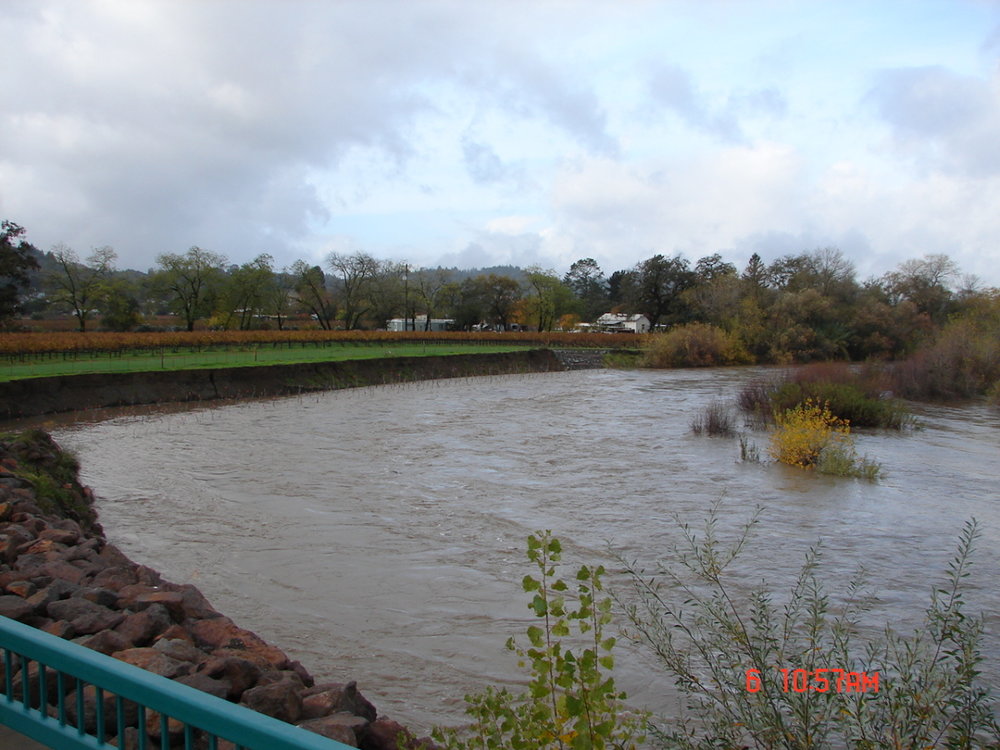
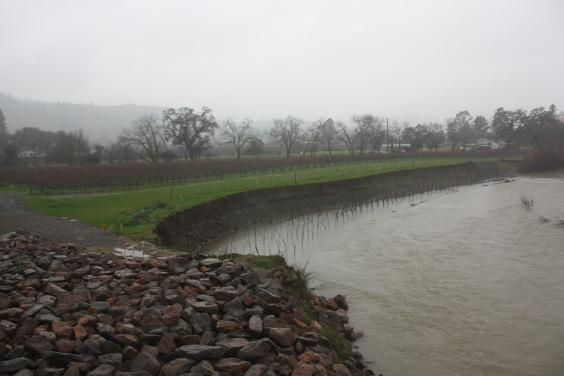
Live siltation is an appropriate practice along an outer bend with sufficient scour or toe protection.
 PLANNING
Useful for Erosion Processes:
- Toe erosion with upper bank failure
- Scour of middle and upper banks by currents
- Local scour
- Erosion of local lenses or layers of noncohesive sediment
- Erosion by overbank runoff
- General bed degradation
- Headcutting
- Piping
- Erosion by navigation waves
- Erosion by wind waves
- General bank instability or susceptibility to mass slope failure
- Erosion by ice and debris gouging
Spatial Application:
- Instream
- Toe
- Midbank
- Top of Bank
Hydrologic / Geomorphic Setting
- Resistive
- Redirective
- Continuous
- Discontinuous
- Outer Bend
- Inner Bend
- Incision
- Lateral Migration
- Aggradation
Design Guidelines / Typical Drawings:
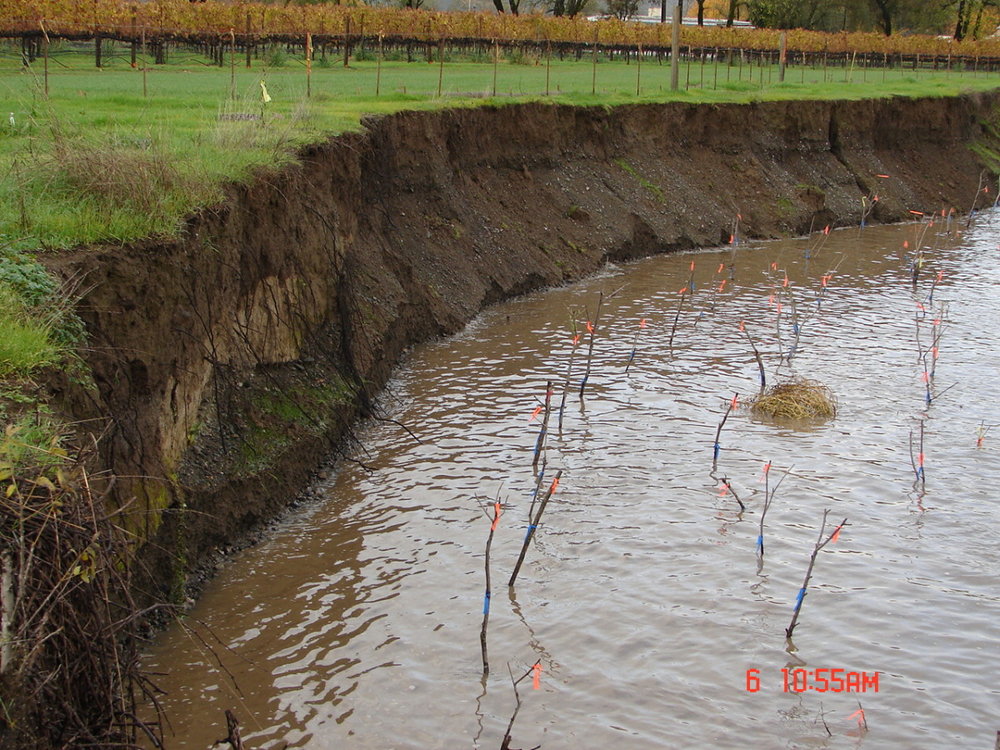
Cuttings should be placed adjacent to the water’s edge to ensure effective sediment trapping and velocity reduction at the toe of slope. At least 40 branches per m (12 branches per ft) should be installed.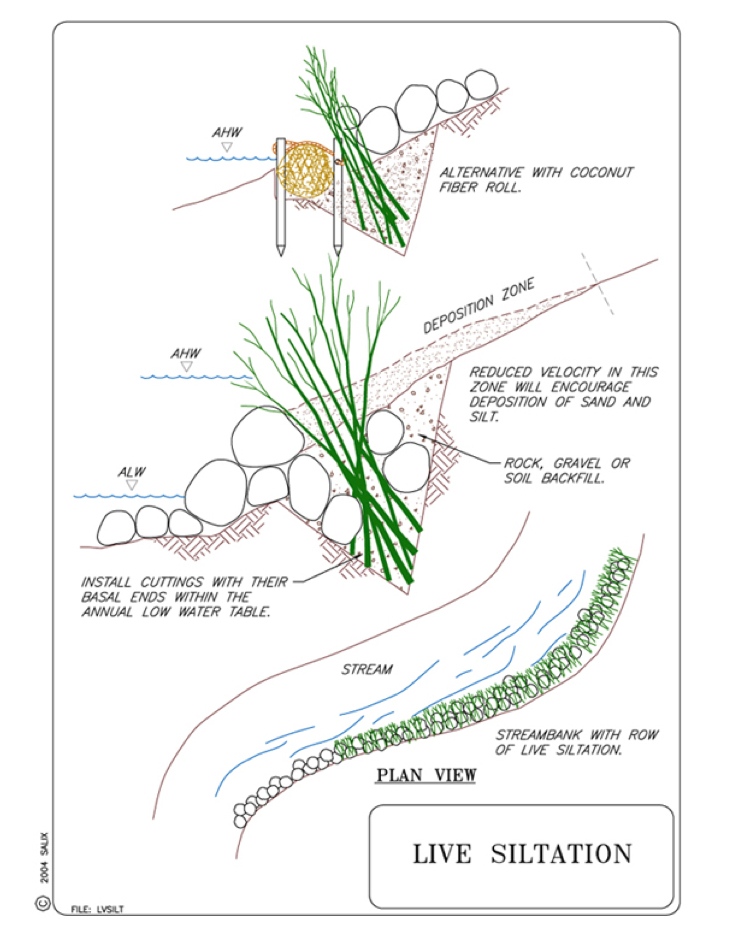
ENVIRONMENTAL CONSIDERATIONS / BENEFITS
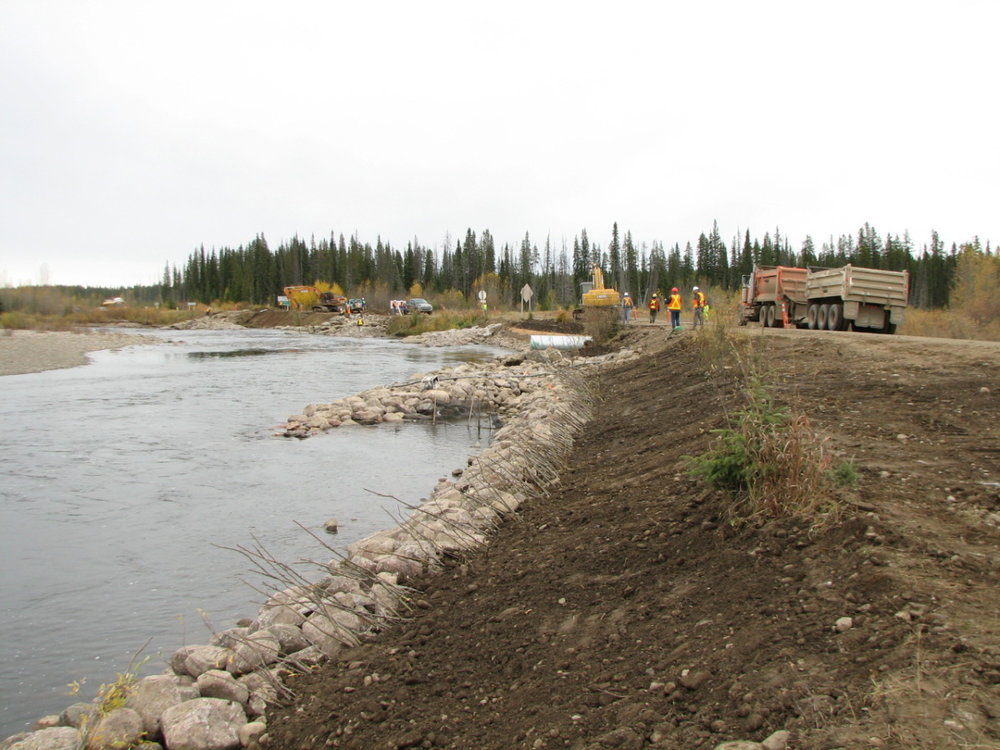
This is a very effective and simple conservation method using local plant materials. This technique is particularly valuable for providing immediate cover and fish habitat while other revegetation plantings become established. The protruding branches provide roughness, slow velocities, and encourage deposition of sediment. The depositional areas are then available for natural recruitment of native riparian vegetation.
HYDRAULIC LOADING
This technique may be used for velocities up to 2 m/sec (6.6 ft/sec), but velocities should be at least 0.25 m/sec (0.8 ft/sec) for the system to function properly.
COMBINATION OPPORTUNITIES
Live siltation techniques can be constructed in combination with rock toes, Rootwad Revetments, Coconut Fiber Rolls, Live Fascines, and Brush Mattresses.

This is a very effective and simple conservation method using local plant materials. This technique is particularly valuable for providing immediate cover and fish habitat while other revegetation plantings become established. The protruding branches provide roughness, slow velocities, and encourage deposition of sediment. The depositional areas are then available for natural recruitment of native riparian vegetation.
LIMITATIONS
If using a living system, cuttings must be taken during the dormancy period.
MATERIALS AND EQUIPMENT
Natural stone, willow wattles, logs or root wad revetments are needed for toe and scour protection. The live siltation will require live branches of shrub willows 1-1.5 m (3.5–5 ft) in length. The branches should be dormant, and need to have the side branches still attached. Any woody plant material, such as alder, can be installed for a non-living system.

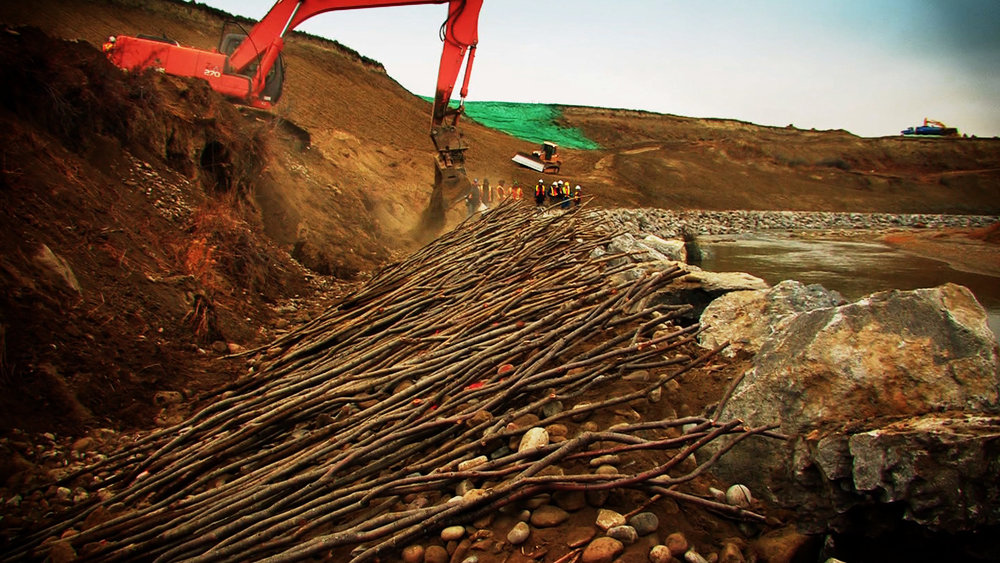
CONSTRUCTION / INSTALLATION
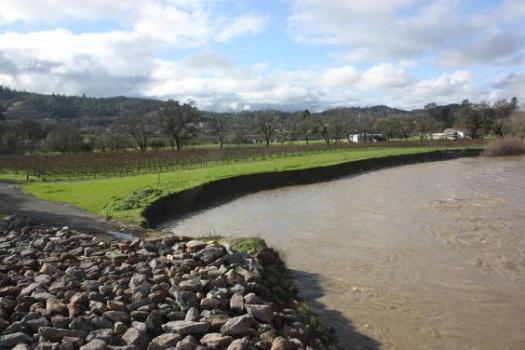
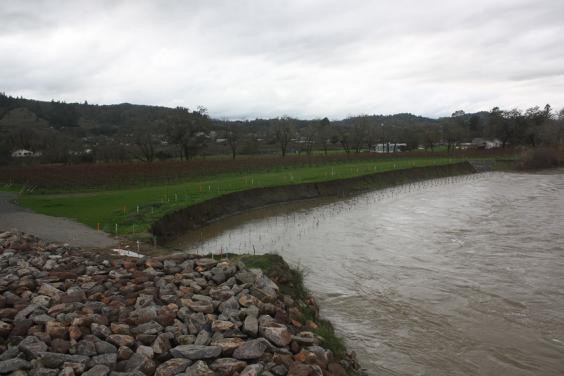
Construct a V-shaped trench at the annual high water (AHW) level, with hand tools or a backhoe. Excavate a trench so that it parallels the toe of the streambank and is approximately 0.6 m (2 ft) deep. Lay a thick layer of willow branches in the trench so that 1/3 of the length of the branches is above the trench and the branches angle out toward the stream. Place a minimum of 40 willow branches per m (12 branches per ft) in the trench.
Backfill over the branches with a gravel/soil mix and secure the top surface with large washed gravel, bundles/coir logs, or carefully placed rocks. Both the upstream and downstream ends of the live siltation construction need to transition smoothly into a stable streambank to reduce the potential for the system to wash out. More that one row of live siltation can be installed. A living and growing siltation system typically is installed at AHW. A non-living system can be constructed below AHW during low water levels. If it is impossible to dig a trench, the branches can be secured in place with logs, armor rock, bundles made from wattles, or coir logs.
COST
0.7-2 work hours per linear m (0.2-0.6 work hours per linear ft), plus willow stock if not readily available on site.

MAINTENANCE / MONITORING
During the first year, the installation should be checked for failures after all 1-year return interval and higher flows, and repaired as necessary. During summer months of the first year, ensure that cuttings are not becoming dehydrated.

COMMON REASONS / CIRCUMSTANCES FOR FAILURE
Cuttings will not promote siltation as well if not located at the water’s edge. If located further up the bank, cuttings may dry out, and will only trap sediments and slow velocities during high flows. Cuttings may not grow well if not handled properly prior to installation. See The Special Topic: Harvesting and Handling of Woody Cuttings for proper handling instructions.


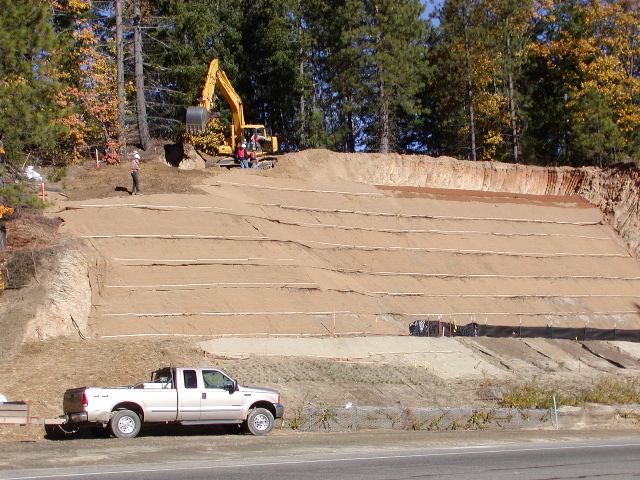
 As usual, one of the best ways to learn is by doing so my Shasta College Class, AGNR-66 Watershed Restoration Practicum, designed and built a biotechnical streambank stabilization project during the Stillwater Creek Workshop. We wanted to build a hands-on project that would showcase the College’s abilities. Brushlayering with willows (with or without geotextile inclusions) is, I believe, one of the most important bioengineering techniques – a technique that “is as old as dirt”, which utilizes/demonstrates the engineering principles of “reinforced earth”. Reinforced earth allows one to design/build stable slopes that can be steeper than the materials natural angle of repose. Another plus that I am finding is the reinforcement can replace a bit of the compaction that is usually applied. Plants prefer compaction in the 80%-90% range, so reinforced soil slopes can be a win win with regards to establishing vegetation. Contemporary reinforcements are provided by materials such as “geogrids” – very strong black polypropylene geotextiles (geogrids typically look like the temporary orange environmental fencing though manufactured with many strengthening properties. Well, “back in the day”, ancient China, Rome, and more recently Switzerland/Austria, the soil reinforcements were comprised of plant materials. Willow (Salix sp.) have played a long and successful role in soil reinforcement – imagine a geogrid that can grow and get stronger with time while providing immediate erosion control and environmental enhancements!!!
 When we soaked our bundles of branches, about 25 per bundle, we attracted some local bank beavers to ‘chow down’. They must have felt like somebody delivered pizza to their living room! Beaver cages are often used in Canada but I’ve never had to use one in CA before. Having some Enka mat TRM and orange fencing leftover, we improvised and ‘beaver-proofed’ our bundles!!
 Bio Draw 1.0 and ESenSS (NCHRP Report 544) both give design/construction specs for VMSE – often referred to as “burrito wraps” or soil wraps. While they look good on paper, they are quite difficult to build, especially if there is insistence that the outer face of the wrap (lift) is “flat and planer”. The outer face is just too hard to pound or shape smooth before the wrap is made, go ahead, try to build a form or something, but trust me it takes a bit of time and many construction folks will baulk at the design. Note: the linear / flat face is not the most stable, according to Dr. Donald Gray. The outer geogrid will naturally form a more stable catenary curve shape. I refer to it as the “the wrap, when in x-section will look like a beer belly or pregnant tummy” so why fight nature and try to make it absolutely flat at exactly 1.5:1 for instance? Below are typical drawings for VMSE and flapping.


 We couldn’t have done this project without the help of Bruce Lawson and his class. Bruce teaches Heavy Equipment Operations at the College, and he is one of the best dozer operators and human beings I know. Here is a picture of Tara giving Bruce her finger in his chest, all in jest. She broke her finger and it was splinted with wire and tape, We probably should have used a willow branch as the salicylic acid (yes, aspirin comes from willow!) may have relieved the pain.
 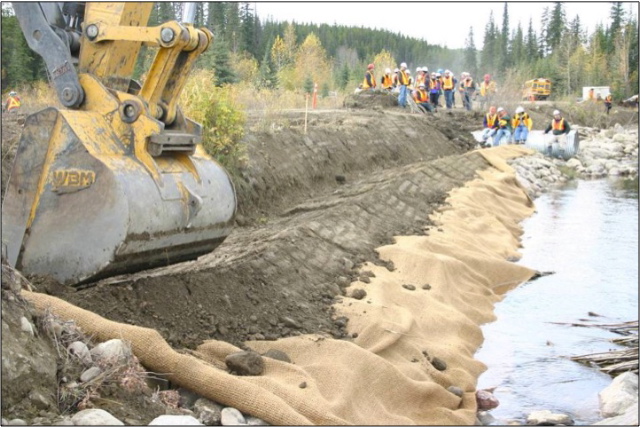 Next installment, after Christmas, I’ll cover some of the things we learned about Stillwater Creek, the evaluation of the old state-of-the-art streambank stabilization techniques (circa 1970) and how they (gabions and tires) are unraveling today, and more tips from David Derrick. Stay Tuned!