CASE STUDIES

Dirttime.tv will post blogs of Case Studies regularly.

In 2005 the Transportation Research Board and National Academy of Science published NCHRP Report 544 – Environmentally Sensitive Channel and Bank Protection Methods, meant to provide “DOT Highway engineers with “alternatives to riprap”.

John “wrote the book” on ‘alternatives to riprap’ for the federal highway’s transportation research board.

John, wearing another hat as a practicing fluvio-geomorphologist, has been designing and building, and documenting alternative-environmentally-sensitive methods for over 15-years.  John’s experience involves project design, management, of channel and bank methods that incorporates “rock and willow – biotechnical methods.  Definition of Biotechnical Methods – methods that combine engineering/structural elements (rock, large woody debris, rock and willow-filled gabion structures etc.) combined with vegetative elements in a mutually-reinforcing manner.

Dirttime.tv will make an effort to present these methods, as case studies, beginning with the Caltrans SR 128 Geyserville Bridge over the important Salmonid-rearing Russian River, in the wine region.

Reports, Techniques, & More

  1. Geyserville Report March 8
  2. Russian River Bank Stabilization Timelapse
  3. Willow Live Siltation
  4. Willow Posts and Poles
  5. Redirective vs. Resistive Stabilization
  6. Self Launching vs. Graded Stone
  7. Environmentally Sensitive Streambank Article in Land and Water
  8. What I’ve Learned About Streambank Stabilization Article in Land and Water
  9. Crews Try to Save HWY 128 at Geyserville Bridge

Bluffs Project 2 – Fall 2021


Project Techniques:

  1. Vegetated Mechanically Stabilized Earth (VMSE) and Modified Filtrexx Soxx – Living Wall Techniques,
  2. Custom-filled Grow Soxx – Redding Greenwaste Compost, native grass seed blend, and mychorrizae added to soxx,
  3. Willow brushlayering – branches soaked for 10 days minimum,
  4. Native grass plugs, Nassella pulchra and Elymus glaucus planted into socks with dibble,
  5. Temporary drip irrigation installed


The VMSE and Grow Soxx Living Wall techniques were again chosen to arrest steep slope erosion at the Bluffs Condominiums in Redding CA.

Bluffs Project 1 was implemented and successfully completed in January, 2019. Encase you missed it check out the first Bluffs project summary here.

Bluffs- Slope Stability Project 2019 Bluff - Slope Stability 2022
Figure 1 Figure 2
Figure1 and Figure 2 “Bluffs 1” soil slope stability project completed in January 2019 and after the photo was taken March 2022. See BLOG for more details
 

Problem Statement

A soil stability analyses was conducted and determined that basically the Bluffs (a very steep and 200-300 ft high geologic feature that formed millions of years ago and was then carved by the Sacramento River, along the outer bank, thousands of years ago) is a relatively stable feature. The exposed bluffs have metamorphosed into a very stable conglomerate that is not prone to slope failure, although it has been incised by drainages running across the top of the bluffs and allowed to run over.
The more localized problems facing the “BLUFFS Condominiums” and HOA (developed in 1970s) were determined to be caused, not by systemic instability of the steep slopes, but instead the slumps and soil failures were caused by both broken irrigation lines and “wind throw” of some oak trees growing on the edge of the 200-ft high bluffs. Note that the slope below the condominium development is well vegetated native shrubs and trees common to the Sacramento Riparian zone, Oak, cottonwood and important for this project, willow species. The most stable areas downslope, but still hundreds of feet above the river, is willow species. Once again, according to the authors experience and opinion, willow appears to be “pioneering species” that provides masses of fibrous roots to help “nature” heal itself for an initial period while then ‘surrendering’ the stabilized soil area to more climax species.

The second BLUFFS repair was initiated in phases. The 30’ high repair was ‘anchored’ at the bottom on a 3’-wide flat area, little more than a game trail.

As with the previous Bluffs project, access to the slumping area was limited to wheel barrow and hand carrying. All work had to be performed with hand tools.

BioD logs and Blocks 01 BioD logs and Blocks 02
Figure 3 Figure 4
Figure 3 and 4 The lower portion of the 30-ft high slump/gully repair used 10 (ten) lifts comprised of coir BioD logs and Blocks, reinforced with willow brushlayering – 4-5’long branches placed, dipping 10-20 degrees into the fill, at a rate of 2-3 branches per foot

Figure 5 Figure 6
Figure 5 and Figure 6 Willow branches were kept moist while being harvested and delivered to the site. As per Harvesting and handling techniques documented in NCHRP Report 544 – Environmentally Sensitive Channel and Banks Techniques, 2005, J.McCullah, Transportation Research Board. Figure 5 shows coir BioD logs and Blocks used to stabilize and support the face of the Vegetated Mechanically Stabilized Earth (VMSE).


VMSE is one of 54 techniques identified by McCullah, et.al. in the Federal Highways / Transportation Research Board commissioned research to identify “alternatives to rip rap” that could be integrated into environmentally-sensitive highway projects. NCHRP Report 544- Environmentally-Sensitive Channel and Bank Protection Methods , aka E-SenSS published by McCullah identify over 50 methods that not only protect channels and streambanks but also provide habitat enhancements. The reports provide selection guidance, construction specifications, Auto-cad (dwg) and Microstation (dgn) typical drawings of techniques like Rock Vanes, Bendway Weirs, Large woody debris, Brushlayering, Live Siltation, Longitudinal Stone Toe protection, and Engineered Rock Riffles.

These are methods that the author has designed, built, and demonstrated for over 15 years now, including sensitive projects like CalTrans Highway 128, Russian River Geyserville Bridge protection utilizing 5 redirective rock vanes, live siltation, flood terrace with Live Pole Plantings. McCullah also designed and demonstrated, as week-long workshops of sensitive Alberta Highways projects in the Canadian Rockies. Projects also include bank stabilization (the first time using Coir BioD Logs with willow brushlayering) on the Chena River in Fairbanks. This project built in 2006 is still stable today (a wall of willow, sustainably pruned, is still supported by the long-lasting coconut logs and soil-filled ‘bio-bags’.
John used the NCHRP techniques in a successfully-implemented, 8000ft-long urban stream repair and modification in Auckland New Zealand while he also designed a huge engineered (Newbury) rock riffle for grade control on the Pedu River in the mountainous northern region of Malaysia. The design criteria were taken from the NCHRP Report 544. Future blogs will describe these projects in depth.

Figure A


VMSE Wall
VMSE Highway Fill Project Stream Thalweg
Large VMSE highway fill project on Hwy 330 in San Bernardino County
Figure A descriptive flyer showing the “invisible” 2-inch diameter holes manufactured into the BioD Logs and Blocks. The right hand photos show a VMSE wall built on the right descending bank of Cache Creek. To protect the Cache Creek Golf Course, redirective Bendway Weirs (BW), designed to move the high energy vectors of “impinging flows” (the thalweg) away from the bank were combined. The NCHRP report 544 document studies and flume tests that show redirective methods, such as Bendway Weirs and rock Vanes can move the high-energy erosive flows, defined by the location of the stream’s thalweg, over 20% of the streams bankfull width streamward and away from the bank! See the Bendway Weirs above which effectively moved the thalweg to a location “off the BW tips. The once area of high velocity impinging flows is now a low velocity flood terrace. Post project vegetative growth was so thick an after photo is very difficult.


BioD Block Close Up BioD Block Close Up
Figure 7 Figure 8
Figures 7 and 8, The BioD blocks were chosen because of their durability and longevity (ability to secure soil until willows and grasses become established) and because they are manufactured with holes through the blocks/logs which allow willow branches and or securing devises, like Gripple Anchors, through the logs.


Custom-fill Grow Soxx Grow Soxx
Finn Bark Blower Compost Soxx

Custom-filled Grow Soxx was used for the upper section of the project.  A Finn BB302 Bark Blower was rented from Global Machinery for a day.  We filled over 600 lf of Grow Soxx using Filtrexx fill sock material.  Because of the tight access, all the materials had to be brought in by hand.  Filling our own socks allowed much flexibility.
We filled soxx with compost that was well cured and added native grass seed and mycorrhizae fungi.  Look carefully and you’ll see that a few socks had willow cuttings added as a trial – they sprouted within the soxx is a couple of weeks but the sprouts never were observed to penetrate the sock netting.


Filtrexx biodegradable soxx Filtrexx biodegradable soxx

We also obtained from Filtrexx some new soxx made of biodegradable material.  It will be interesting to see how durable the material is, but so far the biodegradable soxx have maintained structural integrity for almost 5 months.

Filtrex 4ft long compost soxx
Figure The “component nature” of the 4ft long compost soxx allowed a lot of flexibility in construction- we could “fill” behind the Coir logs with compost filled soxx and fit the soxx segments around and between existing stabilizing shrubs. Below the vegetated grow soxx were fit between and under the branches and roots of an existing California wild grape (Vitis californica)
 

Final Results

John helped a retired couple on the Sacramento River, between Anderson and Redding, realize a dream, a plan to convert 1-ac of their 4-ac Riverfront property, containing all the trees indigenous to Sacramento River Riparian Forest, into a self-sustaining native grass understory.  The Smiths had battled the weeds, huge blackberry bushes, and massive California Grapevines – climbing and hiding even the most massive Cottonwood trees.  Physical removal along with generous applications of roundup and other herbicides, the acreage was ready for a ground cover.

The Smith’s were ‘all in’ when introduced to the idea of re-converting the ground cover to organic matter and native grasses and regenerating the silty soil to one with healthy microbes, mycorrhizae fungi, an organic source of slow-release fertilizer (BioSol).  We all agreed that the soil was, after several years of chemical treatment, was not healthy nor self-sustaining.

Carbon Sequestration was also a goal, and while the project was not a scientific experiment set up to determine the amount of CO2 reduction, all the parameters needed, an example if you will, to sequester C over the long-term.  This project was very interesting so Kevin Ernst, Haven Falls Motion Pictures, and I decided to produce the short dirttime.tv clip.

The documentary movie “Kiss the Ground” clearly explains how Healthy Soils are, while rapidly disappearing, can provide one of the largest CO2 Sumps existing on Earth.

So in a way, this project demonstrates, by example, how to apply the principles of soil regeneration, i.e.

  1. Provide organic matter (Carbon to feed the organisms and reduce the soil bulk density)
  2. appropriate native perennial seed bank
  3. don’t forget to add mycorrhizae (with the previous soil treatments ** we were pretty sure mycorrhizae was absent.  These then are the basic building blocks for healthy soil and carbon sump.


See a compost blanket solution in action!

Video of compost blanket solution in action

We decided to film this project to show how an Express Blower Machine can apply a compost blanket over one acre.

Dirttime.tv would like to thank Rick and Mary Smith for agreeing to the job and also allowing us to film it.

Redding Greenwaste Compost was used – approximately 200 CYs were applied.

This project is also dedicated to Phil Reiker, the original owner of Jet Mulch, located in Santa Cruz area. Phil passed away this year. He was an exceptionally generous and considerate man who always helped spread the word about Compost. Phil’s family sold the business to Jet Mulch’s dedicated employees, Mario and Ryan Gamboa, who are carrying on the tradition of helping with education and awareness.


Costs - Compost Project


The above PDF is an excerpt taken from a presentation made by John (dirttime.tv) and Finn Corporation, entitled “Effective Erosion Control BMP’S Through Hydromulching and Compost Blankets” made during the IECA Virtual Conference 2021.

NEW Course – The ABCs of BMP Installation including Canadian Edition and BMP Manual Download is ready! This 0.5 CEU Video Course covers (14) standard, benchmark BMPs, from Soil Preparation/Soil Roughening, to Turf Reinforcement Mats, to Stabilized Construction Entrance, to Sediment Barriers for Slope Interruption and Toe-of-Slope Applications.  The course also includes the free download of BMP Manual – Best of the BMPs Guidance Manual, 5th Edition to help reference the Construction Specifications and Inspection and Maintenance Recommendations for each BMP.

Here is what Graham Tait, Stormwater Specialist, Calgary, Alberta has to say;

“Congratulations, John, Kevin, and Team!
I love the content – it’s engaging, well laid out, and thorough! It really ‘hits the nail (or the wood stake) on the head’ for everything industry personnel need to know about ESC best practices. It is essential and informative training for beginners to experts alike!  And I like that people will be able to refer back to the videos and supplementary materials such as drawings and notes once they have signed up. Superb work!”

USD$250.00 – CAN $340.00
Canadian Edition for nearly CAD$70 off for CAN-IECA Chapter members*
Special Offer over 20% off for CAN-IECA
Members CAN$270.00
(use coupon code “CAN-IECA”)

The video course takes the learner to a level un-available via the standard webinar format.  The student will have to ability to recognize that specified installation rates were applied, see Straw Mulch applied at 1T/ac (2000kg/ha), and then compare it to what 2T/ac (4000kg/ha) looks like.  How is a tackifier applied?  Also compare BFM applications of 3.500-4,000#/ac (4000kg/ha) to a lesser amount.  See, first-hand (almost!) what BFM applied at 100% coverage looks like in the field.

*Professionals who are current members of AustralasiaIECA Chapter will receive a discount.

NEW Course – The ABCs of BMP Installation will be released this week. This 0.5 CEU Video Course covers (14) standard, benchmark BMPs, from Soil Preparation/Soil Roughening, to Turf Reinforcement Mats, to Stabilized Construction Entrance, to Sediment Barriers for Slope Interruption and Toe-of-Slope Applications.  The course also includes the free download of BMP Manual – Best of the BMPs Guidance Manual, 5th Edition to help reference the Construction Specifications and Inspection and Maintenance Recommendations for each BMP.

Here is what Graham Tait, Stormwater Specialist, Calgary, Alberta has to say;

“Congratulations, John, Kevin, and Team!
I love the content – it’s engaging, well laid out, and thorough! It really ‘hits the nail (or the wood stake) on the head’ for everything industry personnel need to know about ESC best practices. It is essential and informative training for beginners to experts alike!  And I like that people will be able to refer back to the videos and supplementary materials such as drawings and notes once they have signed up. Superb work!”

USD$250.00 – CAN $340.00
Special Offer over 20% off for CAN-IECA
Members CAN$270.00
(use coupon code “CAN-IECA”)

The video course takes the learner to a level un-available via the standard webinar format.  The student will have to ability to recognize that specified installation rates were applied, see Straw Mulch applied at 1T/ac (2000kg/ha), and then compare it to what 2T/ac (4000kg/ha) looks like.  How is a tackifier applied?  Also compare BFM applications of 3.500-4,000#/ac (4000kg/ha) to a lesser amount.  See, first-hand (almost!) what BFM applied at 100% coverage looks like in the field.

You will be able to sign up soon.

John

The “Big Four” Erosion Control (raindrop) BMPs

I often inform my students that an estimated 90% of the erosion in the world is caused by raindrop erosion. You know, the energy from a falling raindrop onto bare soil is like a bomb!! Or actually millions of little bombs during a decent storm.  It is this energy (Raindrop Impact) that detaches and dislodges soil particles, by a magnitude, at least, over tractive forces of flowing water erosion (Rills, Channel Bank, Bed, and Gully Erosion) My physics professor in college demonstrated that the raindrop, average size 1cm3, shaped to minimize friction, need only fall about 30-ft to reach maximum velocity.  That raindrop erosion energy causes the first detachment and breakup of soil particles, and now that soil surface ready now for transport and delivery from sheet flow (sheet erosion).  Note that Sheet Flow doesn’t have much excess energy to needed to dislodge – for that the energy comes from raindrop impact energy.


Envision Junior raindrop hitting bare soil and causing the explosion all the while it also hurts his tush.  Junior will then get a bad attitude and begin running off!  That is how rills start.  That is why, in practicing good erosion control, we are being like good parents and not letting Junior get going too fast.  Junior loves it when we leave the soil surface smooth and hard.  But “good parents” will slow Junior down by roughening the soil surface and putting slope interrupters, like fiber rolls down across the slope/

Go to Jr raindrop Blog


Now envision Junior landing on grass or nice soft Mulch, making a cushion for his tush. He can then slowly infiltrate into the soil. Remember the axiom; “Less runoff from a site correlates to less discharge and less discharge greatly reduces the likelihood of receiving a regulatory action!”

The prerequisite for Raindrop Impact Erosion is laying the soil bare by removing the soil cover. This is usually an anthropogenic (human-caused) land-use problem. Therefore one of the MOST effective BMP is what I call the ‘thinking persons” BMP, which is a do-nothing BMP. That BMP is a “practice” and it is to, whenever possible, Reduce the Amount of Disturbed Area During the Rainy Season. This BMP is related to “Minimize Disturbance BMP” and that is “Leave a Vegetative Buffer BMP”. If a regulator or plan reviewer asks “Where are your Silt Fences”, I like to be able to reply – “See I have designated a Vegetative Buffer capable hydraulically to …..”

Back to the Raindrop Erosion 

Let’s combine the assertion that 90% of the erosion in the world is caused by raindrop erosion with the fact that our “industry” has 4 (four) types of BMPs that are better than 90% effective in reducing Raindrop Impact Erosion. Stated another way, we currently have the Best Available Technology (BAT) that could reduce 90% of the erosion in the world, and that especially includes construction sites. Let’s note these are BMPs that are widely used, tested, and non-vegetative in that they are BMPs that are immediately effective upon application.

Can you guess what the BMPs are? Note I’m not including grasses, seeding or other types of vegetation because even grass seeding takes 3-weeks or more to get protective cover.

The four commonly used BMPs, I call them the “Big Four”, are; 1.) Straw Mulch (94% effective), 2.) Rolled Erosion Control Products (RECPs) (92% – 96% effective), 3.) BFM Hydromulch (some products are 95% – 98% effective, and 4.) Compost Blanket (the uniform coverage of soil with STA Certified Compost, 1.5-inch to 2-inch thick covering, on up to 1:1 slopes**.


Generally, the “Big Four” are recommended for slopes approximating 2:1 but the can be and are occasionally used successfully on steep slopes (up to 1:1 or steeper). However, design considerations are even more important.

In 2010 Caltrans Department of Landscape Architecture developed guidance for steep slopes, see this link for more information:

https://dot.ca.gov/programs/design/lap-erosion-control-design/tool-1-lap-erosion-control-toolbox 

Direct Run-on Away From Slope: To successfully implement erosion control (the Big Four) on slopes all concentrated runoff must first be directed off the slope – only raindrop erosion, please. The Junior Raindrop video taught us the difference between raindrop erosion (hurting Junior’s ‘tush’ as he dislodges particles) versus the tractive forces erosion when Junior and his gang start running. Two entirely different physical processes are involved, gravity and the falling raindrop, vs. kinetic energy – and shear and tractive forces of flowing water. 


Selection Criteria for the “Big Four”

1. Straw Mulch: SM is generally restricted to 2:1 slopes and the ability to anchor the straw effectively with a strong tackifier. Generally, the 2:1 slope should be groomed uniformly and roughened. For the tack coat, I like to use wood fiber hydromulch @ 700# /ac and Guar @ 100-120 # /acre for steep slope applications of Straw Mulch @ 1.5-2.0 T/ac. See the BMP Manual and “Straw Talk”. https://youtu.be/m91AWMLeAoU


2. Erosion Control Blankets (ECB) and Mats: The primary prerequisite to selecting Rolled Erosion Control Products is the ability to grade the slope uniformly (not slick and compacted) to allow “intimate soil contact” and you will be limited by your ability to anchor the ECB with pins. If your slope is excessively rocky and/or there are stumps and clods then you may want to select an equally effective BMP, such as Hydromulch BFM, that doesn’t require anchor pins. Also putting laborers on steep slopes can be challenging. Both BFM (applied hydraulically) and Compost Blanket (applied pneumatically with blower truck) are worthy of considering for steep slopes**.

Always seed the slope before placing the ECB. Some practitioners will Hydroseed the slope before mat installation but hand seeding is also acceptable, be careful, don’t allow workers to disturb seed much while anchoring ECB.

Another criteria for selecting an appropriate ECB is durability and how fast it will degrade. The ECB chosen should not degrade before the vegetative cover can become established. For example, in New Mexico, the DOT determined it took about 3-years for the “native grass/sage regime” to become established. Therefore only Coir Blankets or Excelsior Blankets had the durability to provide the protection needed until the natives took over.


3. Hydromulch BFM: In my experience, and the research bears this out, it takes a BFM Hydromulch to perform in the 96% effective range. The fiber type is important when selecting a BFM, with virgin wood fiber having the most internal friction and tensile strength. But the most important component of an effective BFM is the tackifier(s) that are used – guar and a thermally altered derivative of guar. Yes, the secret sauce recipe is finally been revealed!

BFM, to be 96% effective must be applied for 100% coverage at a rate of 4000 lbs./acre. FYI, one cannot achieve 100% cover over 1 ac of bare soil with 3500 lbs./ac. Also note, if you surface roughen the soil before Hydromulching (preferred practice) you will inadvertently increase the surface area of the soil. It is estimated that dozer tracking a slope will increase the soil surface area by approximately 30%. One can see that BFM applied at 4000#/ac as a minimum is necessary for 100% coverage. Question, How many bags should the Contractor show up with to apply BFM at 4000#/ac? BFM and all hydromulches come in 50# bags. How many bags will it take if you also plan on Track Walking?


4. Compost Blankets: First of all, Compost Blankets as a BMP is defined as a blanket of compost placed over the soil surface at specified thickness AND the Compost must the STA Certified Compost

https://dot.ca.gov/programs/design/lap-erosion-control-design/tool-1-lap-erosion-control-toolbox/tool-1k-11-compost

Before compost application, “the Contractor shall provide the Engineer with a copy of the compost producer’s Compost Technical Data Sheet and a copy of the compost producers STA certification. The Compost Technical Data Sheet shall include laboratory analytical test results, directions for product use, and a list of product ingredients.”

Here is an example of the STA Compost Test Certificate from Colorado.


These design/build projects have been in the works for almost 3 years!   What is both serendipitous and stressing is that all three projects got “permitted” in August/September and have to be completed by of about November.  My staff and I have been working 8-9 hr days for weeks now!!   Its “feast or famine” as they say about construction!!

“The Works” meaning design and permitting. Since these projects are on creeks or rivers designated for endangered Salmon or Steelhead, the permits required include Sec 404 ACOE, NMFS, USFWS, CA DFW, Sec 206 Cultural surveys, Sec 401 Water Quality, and the County of Shasta Grading Permit!!  Just the Ordinary High Water Mark Report required about $5,000 in professional fees, the Biological Report was another $3000, the design was actually the least expense to the landowner.  I’m still doing the project accounting but the rock, equipment and labor was about $90,000.  The design and permitting was over $30,000.

COW CREEK, located in Eastern Shasta County, is an incised salmon/steelhead stream that has generally downcut to the bed rock strata.  There is limited bedload available since the system has been “hydromodified” (nearly 150 years of ranching has resulted in “urbanization response” to runoff) and is suceptable to high stormflows which are now restrained in the active channel.

The project intended to protect the house and garage, perched atop the 30′ high bank, by moving the high energy flow vectors away from the bank slightly using redirective methods ( a 20′ long Bendway weir and three rock barbs), installing 280′ of 4-5′ high Longitudinal Stone Toe, carefully installing clean, angular, well-graded stone (that can be placed in the creek without increases in turbidity) which actually protected the existing trees and shrubs that were barely hanging onto the bed rock cracks.

The challenge was getting down the nearly vertical bank with excavator and then get the 600T of rock down the bank without too much dirt.

Cow Creek during very high flows, Jan, 2017


Looking down the bank at start of work, Sept 2017

Rock was end dumped to help form a temprary ramp. Water was used to keep the rock clean.

Lack of room between trees and shop, and the permits requirements restricted the cut to 6 ft.

Building upstream bendway weir – to nudge high flows streamward

280 LF of LST (5′ high using self launching stone*) allows the construction of a flood terrace. The terrace was vegetated with transplants and willow poles/branches arrayed as “live eyelashes”.

Live Siltation, willow branches pointing outward from LST – the peak of LST at a height near Bankfull discharge elevation, provides roughness as high flows access flood terrace.

The downstream end of project with angled tie back,

Looking upstream – one can see how the well graded stone and careful installation of LST and BARBS actually protected most of the existing willows and carex. It is hoped to be easier to achieve our 70% coverage requirement.

The upstream Bendway Weir is complete and we also placed some clean spawning gravel.Now we will wait for this winter’s storms!!  You can bet we will be out monitoring – stay tuned for more monitoring photos.

By the way, our new website is being planned and developed!! Expect some great changes, including the ability to download video clips, Erosion Draw, BioDraw, the complete or just individual specs from Environmentally Sensitive Streambank Stabilization (ESenSS), or even chapters from Bioengineering Case Studies, 2013, Goldsmith, Gray, and McCullah.

Please let me know what you would like to see more of.   Cheers    John

I gave the Cow Creek project, which was completed and reported in Oct. 6, 2017 a site visit today.  I like to re-visit projects often if possible.  This is perhaps the best learning opportunity for the design/builder.  Seeing if the project and stream is functioning as expected, and then asking what could we have done better.  The last few times I went out to Cow Creek our project work was under water.  It has been a good year for testing stream restoration efficacy. When the flood waters recede the nuggets are revealed.

On this Cow Creek bank protection project not a lot has visibly changed, but that is a good thing since the Family Home at top of bank is still safe and the streambank is looking very secure.

Challenge and Problem – Incised Streams

The systemic problem for Cow Creek is it is “incised” and “entrenched”.  The term entrenched means that the stream channel has downcut. When it has downcut enough that all flow regimes are carried between the banks, like a big pipe, then we say it is entrenched. In geomorphology we classify the downcut channel as ‘degraded’. Conversely, a channel that is choked with gravels and cobbles, appears concave up, and shows widening tendencies would be termed ‘aggraded’.

At one time, in the past, high-energy Cow Creek flows would rise until the floodwaters went out over the floodplain.  Imagine something like an audible sigh of relief as the flood spread out, the raging stream power lessened, and the floodwaters enriched the ranch and farmland with new sediment.  Flood flows are generally low energy and “depositional”.

Over the last several decades, degraded stream channels that are incised are becoming the norm for watersheds experiencing “urbanization”.  It is easy to visualize how an urban area, would send more and more runoff into the urban streams as more and more impervious surfacesm parking lots, roads, roofs, gutters, driveways etc. are built.  These important modes of infrastructure development are problematic in they prevent natural infiltration and thereby increase runoff.  It is insidious because increased runoff causes more flooding, which requires more pipes, and “channelization” which leads to more stream degradation.  The increased runoff to urban streams, over the last 50-years especially, has led to the streams downcutting in order to carry the increased urban generated runoff.

But wait, you might ask, Cow Creek and Stillwater Creek, and similar streams like Red Bank Creek and Reed Creek in Red Bluff are not what we’d call urbanized.  Why are they becoming incised?  Well, urbanization is just one land use that results in more runoff than historically flowed. What is another land use that reduces infiltration rates and causes large-scale increases in runoff?  A tough cookie to swallow is that ranching, especially ranching that involves intensive grazing over 100-years or more.  That ranchland in western Tehama that has such incised channels, downcut over 30’, were, according to local natural historians, intensely grazed by sheep for over 50 years before the cattle ranching took off in 1890s.  You have all heard of a sheep’s-foot compactor used in construction right, well imagine 150 plus years of intensive grazing the deep rooted native grasses indigenous to the areas meanwhile sheep’s feet were effectively compacting soils.  According to the late Dave Dubois, Shasta College NR instructor and natural historian, Western Tehama and Eastern Shasta County was covered with Purple needlegrass, a perennial CA native grass that had roots over 6-ft deep and the individual plant could live 80 years!  However, these native grasses didn’t survive the long term grazing, and they disappeared along with the symbiotic mycorrhizae fungi that helped them survive hot dry summers characterized by 7 months with no rain.

This rangeland in Tehama and Shasta Counties has now been taken over by annual grasses.  The most important message with regards to incised streams is this.  Incised streams are a symptom of anthropogenic land use that increases runoff.  Historically, rangeland covered with deeply-rooted native grasses probably infiltrated all the rainfall received.  Infiltration rates of 2-4” / hr. were probably easily achieved.  Because the roots were so deep, the soil could hold lots of water.  Now the land, covered in annual grasses, with 2”-deep roots, and soil that has a compacted layer at about 8” deep (referred to as the “cowpan”), cannot accept the rainfall received. Over 80-90% turns into surface runoff, gullies run directly into the streams, and the streams begin to become incised and entrenched.  Once the stream flow cannot “go out of bank” and flood, then the incision and channel bank erosion will continue to threaten property and homesteads. It is an insidious process which is in a negative feedback loop.

The challenge along Cow Creek is not really flooding but what happens if your house and property is perched on these high banks that are failing by gravity and bank erosion – how do you stop the bank erosion?

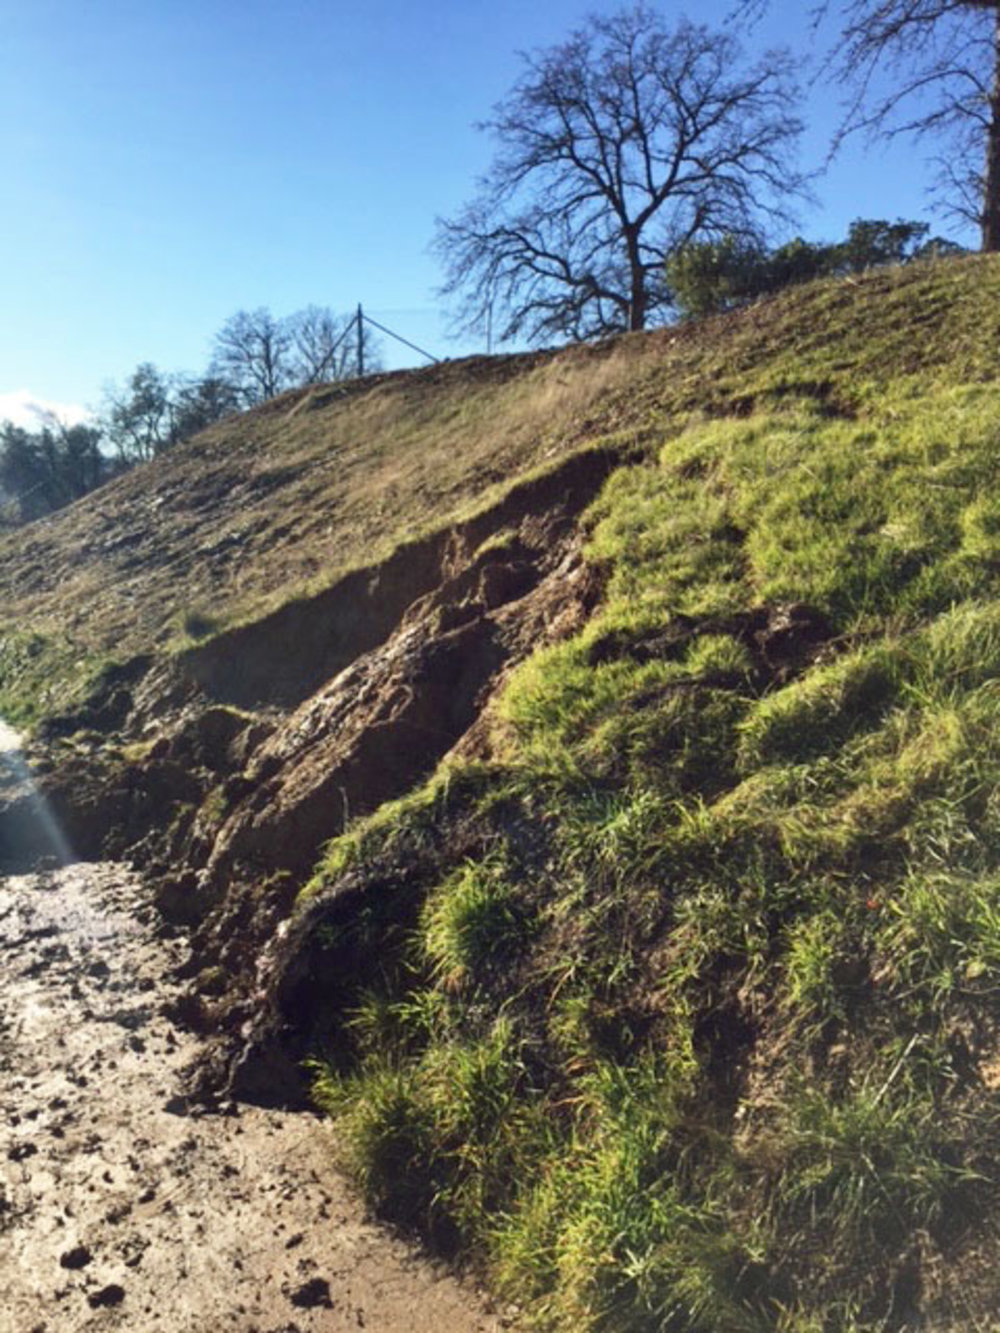
So imagine our site with the family home up on the high bank.  The bank is over-steep, so periodically it fails, sometimes by erosion and often by gravity. The trees and shrubs existing on that bank are really holding the bank up.   That “failed” bank is not so over steepened now since the failed bank material “caught” at the toe of the slope.  But the next high flows washed that away.

Understanding that failure by erosion and gravity, followed by that material (talus) being washed away in high water cycles helped us develop a plan.

The Design

There are a couple of approaches to protecting your streambank from erosion.  But first, when dealing with an incised stream system we have to determine if the downcutting has ceased. The stream was cut down to bedrock.  In fact most of Cow Creek in this entire reach has bedrock exposed over 90%.  Even though the bedrock isn’t real hard, it is a sand/silt stone; it is a good indicator that rapid incision has been arrested.  What if a practioners chose a many – thousands dollar remedy only to “have the bottom” fall out because the stream wasn’t done going down.

An obvious design choice would be riprap.  But laying rip rap in the traditional way would require removing most or all the vegetation on the bank.  That vegetation is the long-term anchoring solution.

Cost Comparison

Rip rap, also called Rock Slope Protection (RSP), places rock armor on the bank of sufficient size and thickness to halt any failure of the bank in question, The property is about 300 ft long and riprap would run about $70,000 just for rock and delivery.  Permitting, especially in our local salmon and steelhead streams, is getting pretty expensive.  It is unknown but doubtful that the Resource Agencies would even permit RSP!

A couple of years ago I was consulting with the local office of the US Army Corp of Engineers about another similar and local stream.  I was given a  guidebook and encouraged that “this is what we are looking for.  The booklet was published by FEMA, entitled Engineering With Nature – Alternative Techniques to Riprap Bank Stabilization, so I’m assuming that permitting RSP streambank stabilization jobs in critical habitat streams wil be a challenge.  It is interesting that Transportation Research Board, addressing a problem posed by the member State DOTs as to “Are there alternatives to Riprap”?  Eventually the request was made into a research project, administered by National Academy of Science and my firm was awarded the 3 year research.  We documented over 40 techniques and methods that were determined to be Environmentally-Sensitive for Channels and Banks.  That report was published in 2005 and entitled NCHRP Report 544 – Environmentally Sensitive Channel and Bank Protection Methods.  Salix Applied Earthcare was granted the authorship and we also distribute the report online, with AutoCad drawings, as ESenSS.

When anadramous fish habitat is present the permits will require State, Federal, and Local involvement.  My experience over the last few years, doing projects, most small in scale and designed to “restore stream function and improve aquatic habitat” have required and effort in “Permitting” that amounts to well over $30,000 or $40,000.  The rock riprap and delivery alone for this job would run about $70,000.  Construction then is usually 2X material cost so conservatively $130,000 for construction costs.  Now the total for RSP or Riprap Bank Protection is estimated at $240,000.

This price is in the ballpark with nationwide averages of riprap protection at $100 to $300 per linear foot of bank.  In this case the 300’ of property would be in the neighborhood of $300K.  Our published NCHRP Report 544 – Environmentally Sensitive Channel and Bank Protection Methods documented that the Biotechnical (using engineering components and biologic components in a mutually-reinforcing manner) Methods studied in our research had real costs of about ½ to 1/3 of cost of riprap.  The cost comparisons were done regionally knowing that rock in Mississippi might have a different cost than California. But a 12’-high RSP job in Mississippi was 1/3 the cost compared to an Environmentally Sensitive job in Mississippi.

Riprap just sends the problem downstream

When you are in an incised stream reach you generally have extremely high stream energy.  When you install riprap along an embankment, that high energy simple gets transferred downstream, maybe to the next landowner and so on.  One thing that reduces energy or absorbs excess energy is “stream roughness”. Establishing lots or riparian vegetation, endemic to the area and adapted to the site is a fundamental way to add roughness.  This is actually the approach described in the Engineering with Nature booklet.  It gave many case studies where natural materials, large woody debris, root wads, bioengineering with native plants, and engineered logjams etc. have had success.  These materials are natures way of ‘adding roughness”.  The Engineering With Nature booklet goes on and states that; “when riprap is the primary or only form of riverbank stabilization measure, the end result is typically a uniform, smooth channel, with no complexity.” This lack of complexity leads to high velocities through the protected reach, no refugia, no place for aquatic organisms to propagate, and no shade or cover.

Choosing an Environmentally-Sensitive Approach

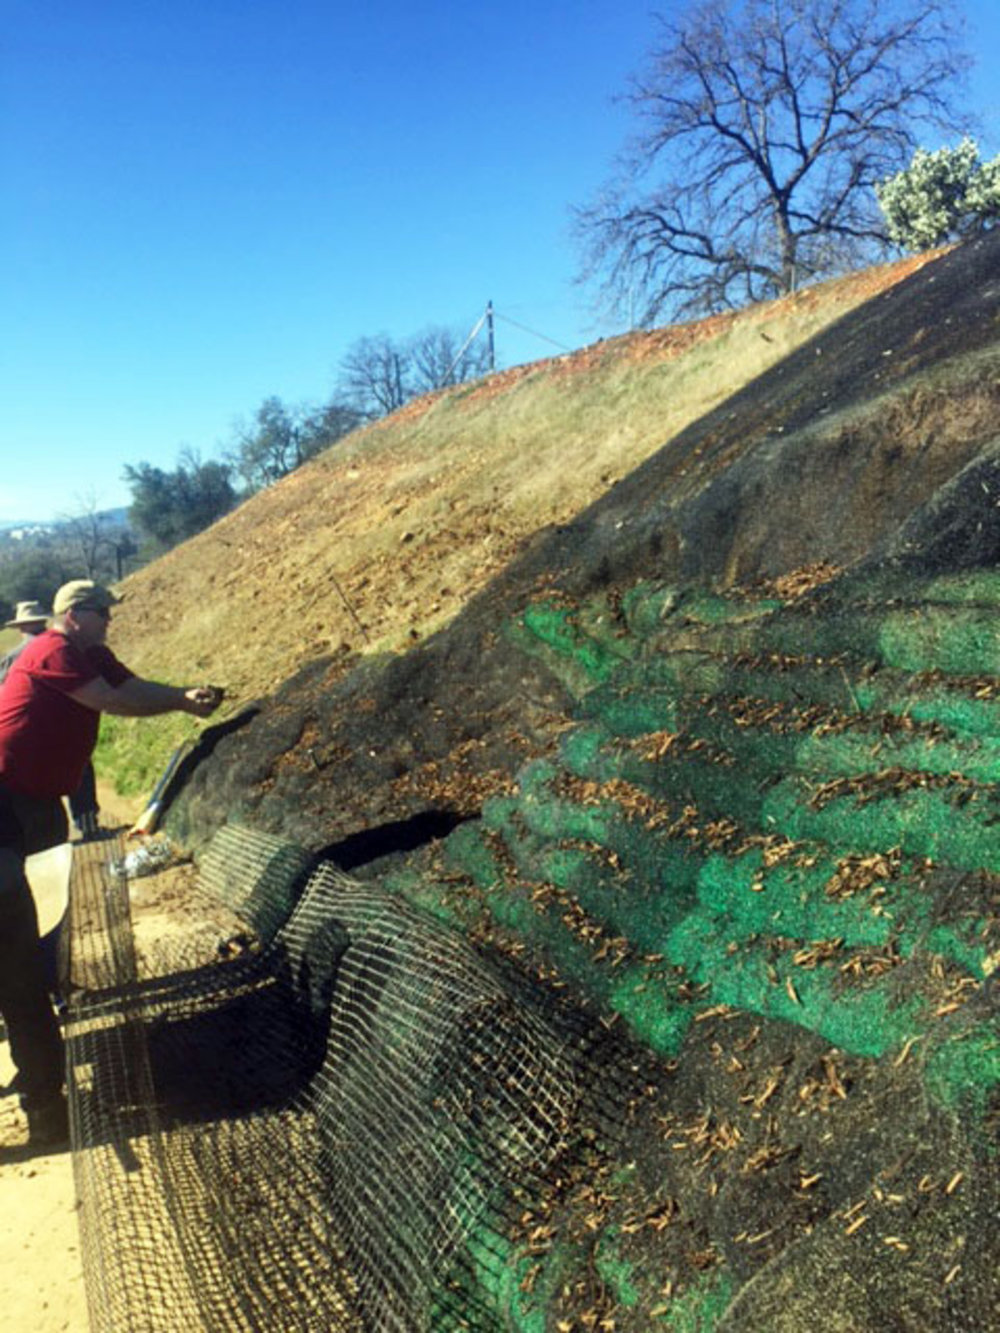
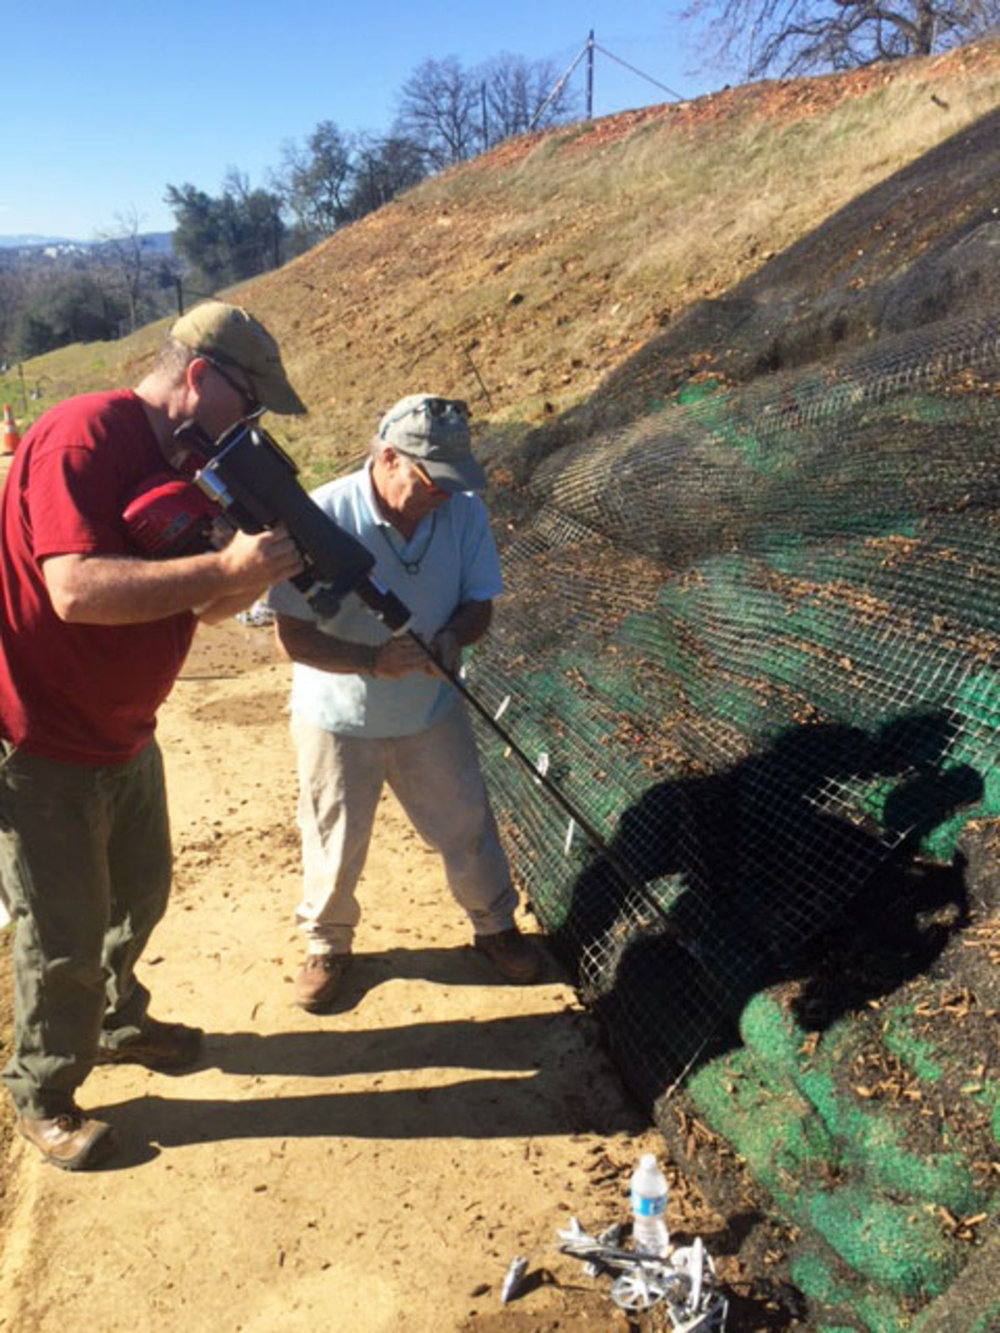
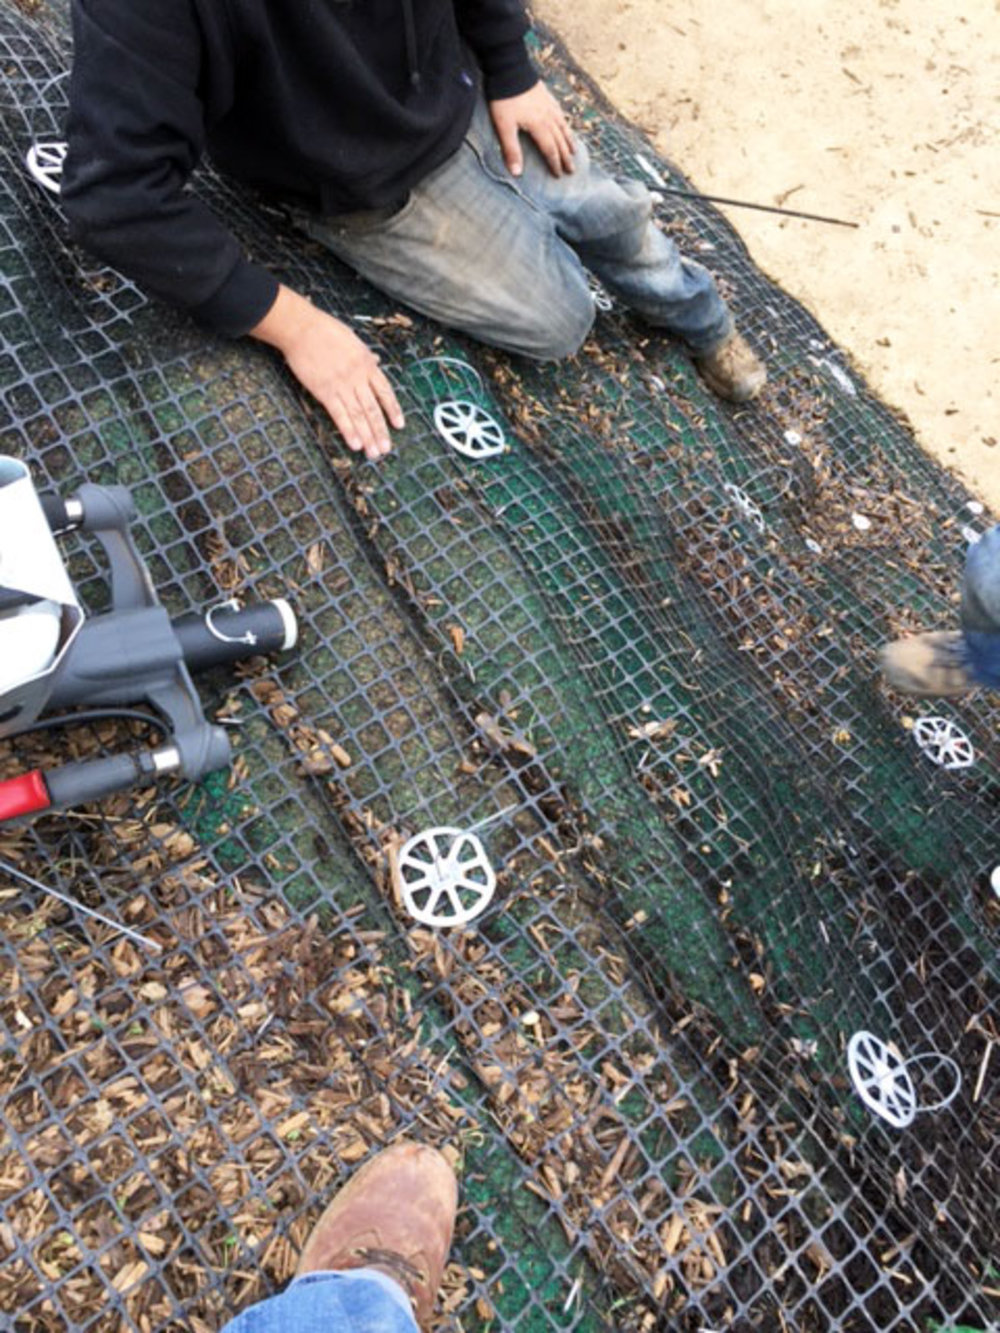
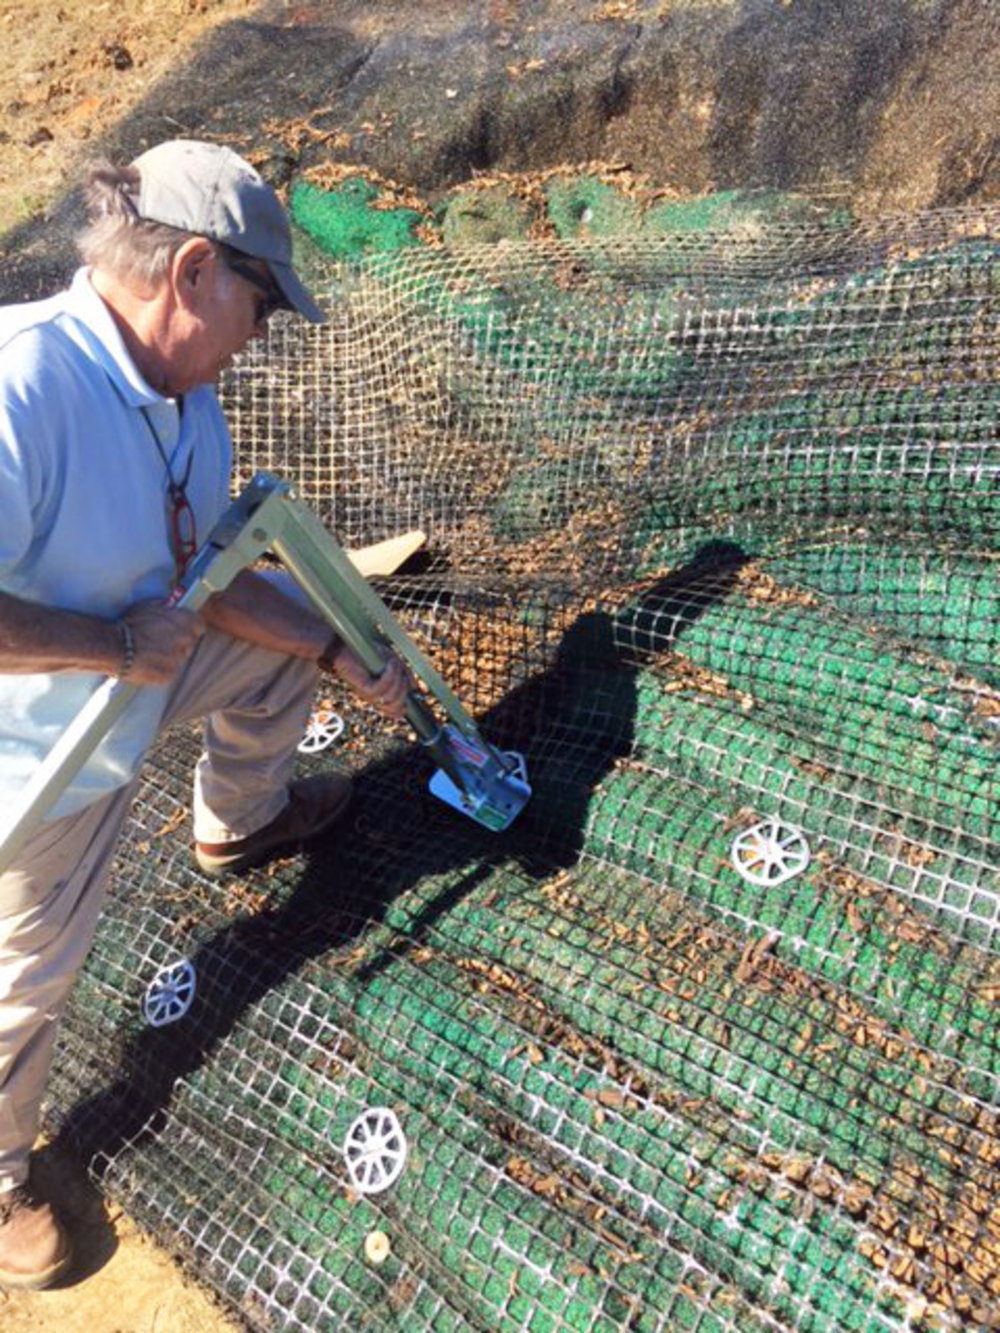
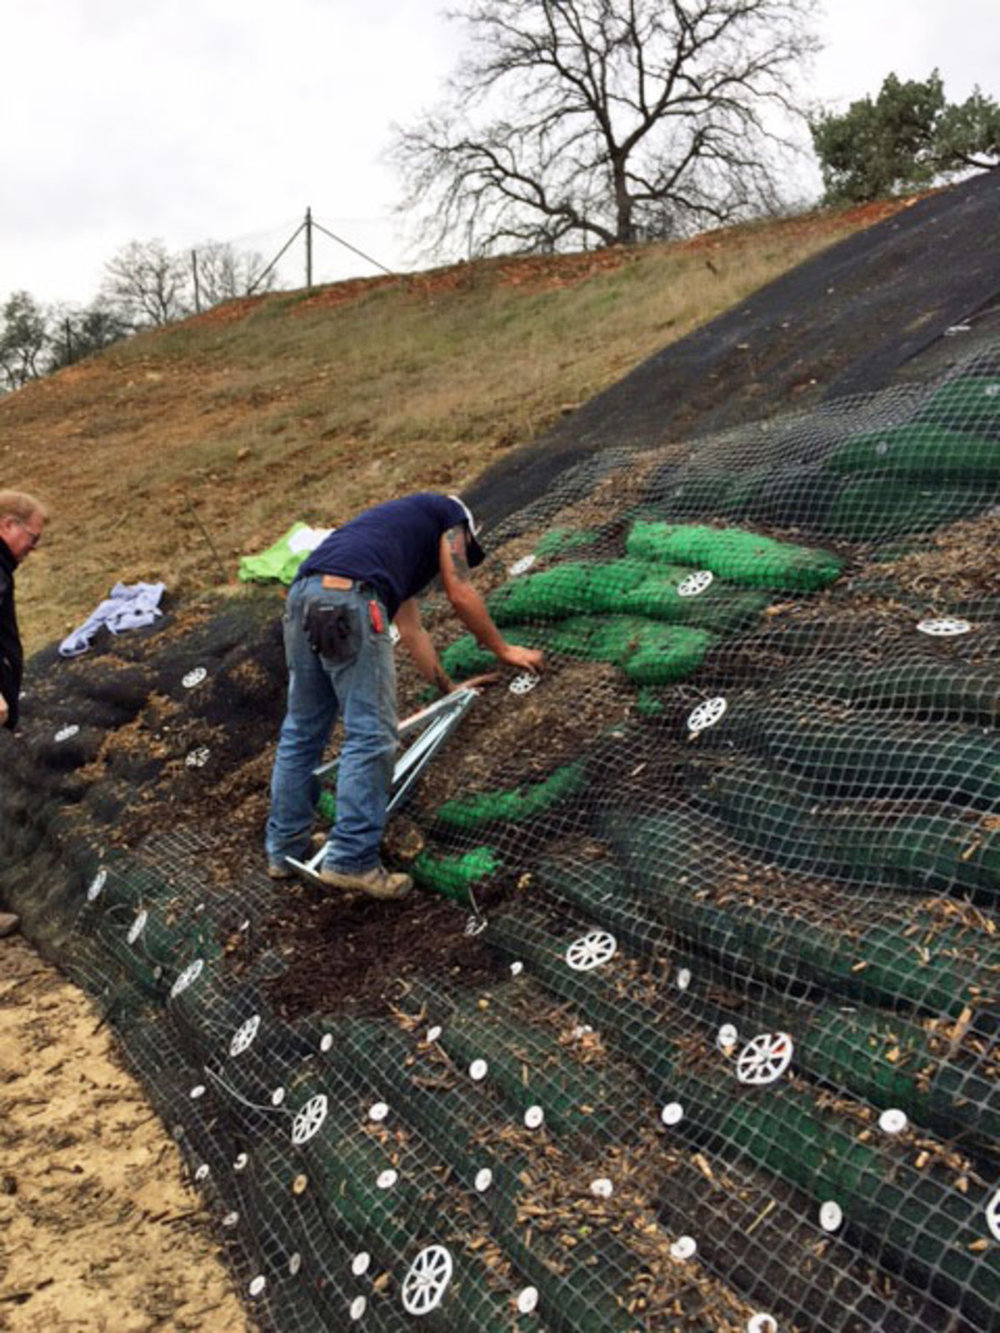
This site, pre-construction, had a lot of vegetative cover on the bank and along the creek fringe. Willows, oaks, Ceanothus, button willow, cottonwood and Oregon ash all existed.  The best design then would be one that preserved the existing plant materials.  We also needed a design that would help “catch and trap” any gravity-type sloughed material from the upper embankment.  The site had an existing terrace comprised of sandstone bedrock about 6-ft wide, dipping from the toe of slope to the ordinary high water (OHW) fringe.  Much of the existing willow shrubs were established along the fringe where that ledge stepped off to low flow water elevation.

We decided to use a 4’-high longitudinal stone toe (LST) along that step.  The stone toe was carefully placed up to, against, and around the existing willow.  We worked carefully and with intention.  The bedrock terrace was modified to become a low-flood terrace.  Flood terraces are another way to dissipate high energy.  The flood terrace was covered with 12”-16” native run cobble, angular rock and then planted (constructed) on the way with out with a technique I call Live Eyebrows, originated by David Polster, from Canada that he calls Live Gravel Staking.  These willow (live siltation) structures are built by dipping the excavator bucket deep into the flood terrace or gravel bar, forming and holding open a slit long enough for a worker to slide in some 3’-long cuttings, then carefully pulling out the bucket will close the slit. The roughness developed is intended to ‘grow the gravel bar upward’.

We desired the fast, high-energy flows directed away from the flood terrace and the toe of the high bank so we installed a designed Bendway Weir at the upstream extent of the property.  We agreed with our CA Fish and Wildlife Permit to only building the Bendway Weir so it protruded less than 1/3 the Bankfull Discharge Elevation width.  As built, the Bendway angled upstream about 15-degrees and will redirect the thalweg (or line or location of highest stream energy) away from the bank and our terrace.  Three other short, 8-ft long Bendway weirs were installed to manage the thalweg. See Fig. 6 The upstream key for our LST and the tieback for our Bendway Weir was also a large rock ramp that we used to get the excavator down the steep bank.  This ramp structure will ensure that high-energy flows never get behind or structures.

The rest of the design involved building the LST as conceptualized in Fig. 4.  The use of clean, angular, self adjusting rock gradations allowed us to place rock around the existing willows when necessary and also the self-adjusting rock precluded us having to damage the existing stream bottom.  By comparison riprap using standard Caltrans rock specifications, would require a 3-6ft deep keyway cut into the natural stream bottom.

The only other construction feature on this project was the extensive incorporation of vegetative – biotechnical elements. The willows and transplants are an important part of the design, so rock placement and bioengineering are dome simultaneously – the vegetation elements are not left as the afterthought.  Most importantly this project mimicked nature and tried to mimic how a natural healthy stream would function, dissipate energy, and pass water and sediment during high flows.

It is my hope that the cost, both in time and money, of acquiring permits for Stream Protection jobs that are demonstrably designed to restore stream function will become less expensive.  As regulators become more and more familiar with these elements maybe a few more green lights will be given.  Like the TSA Pre check, maybe some of us, doing environmentally-sensitive work will be allowed to keep our shoes on during screening.  And then that may inspire others to go out and learn how to do jobs that not only protect streambanks and rivers, but also actually improve aquatic and riparian habitat.

Fig.  1 Site viewing in 2015 during Avg. High Water

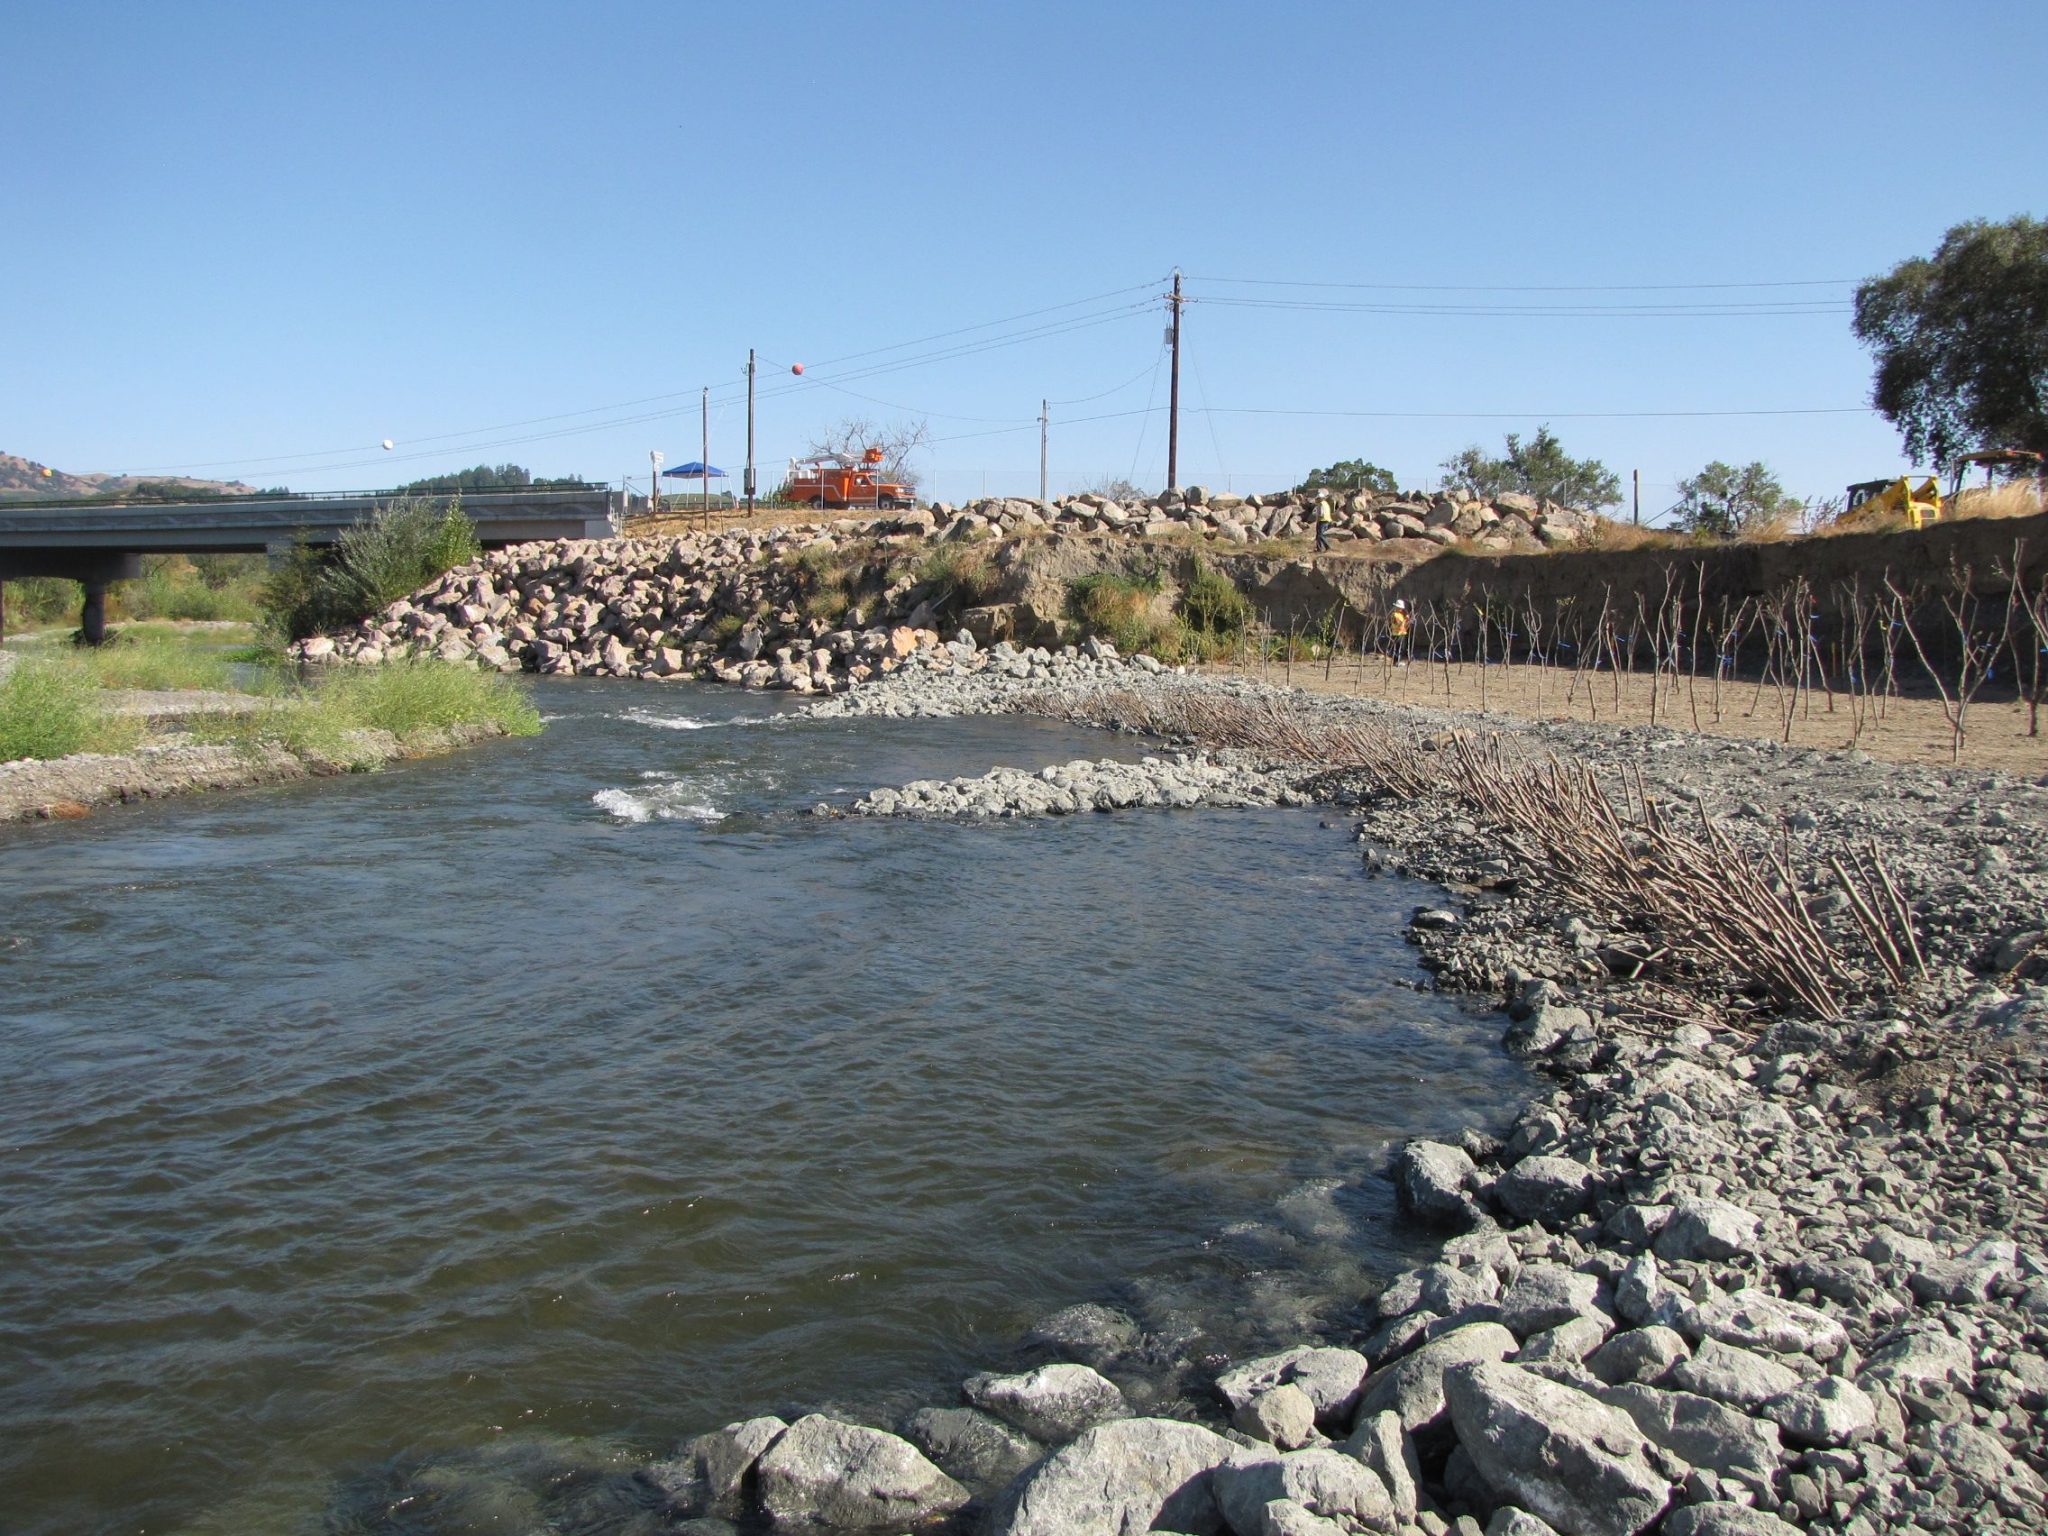
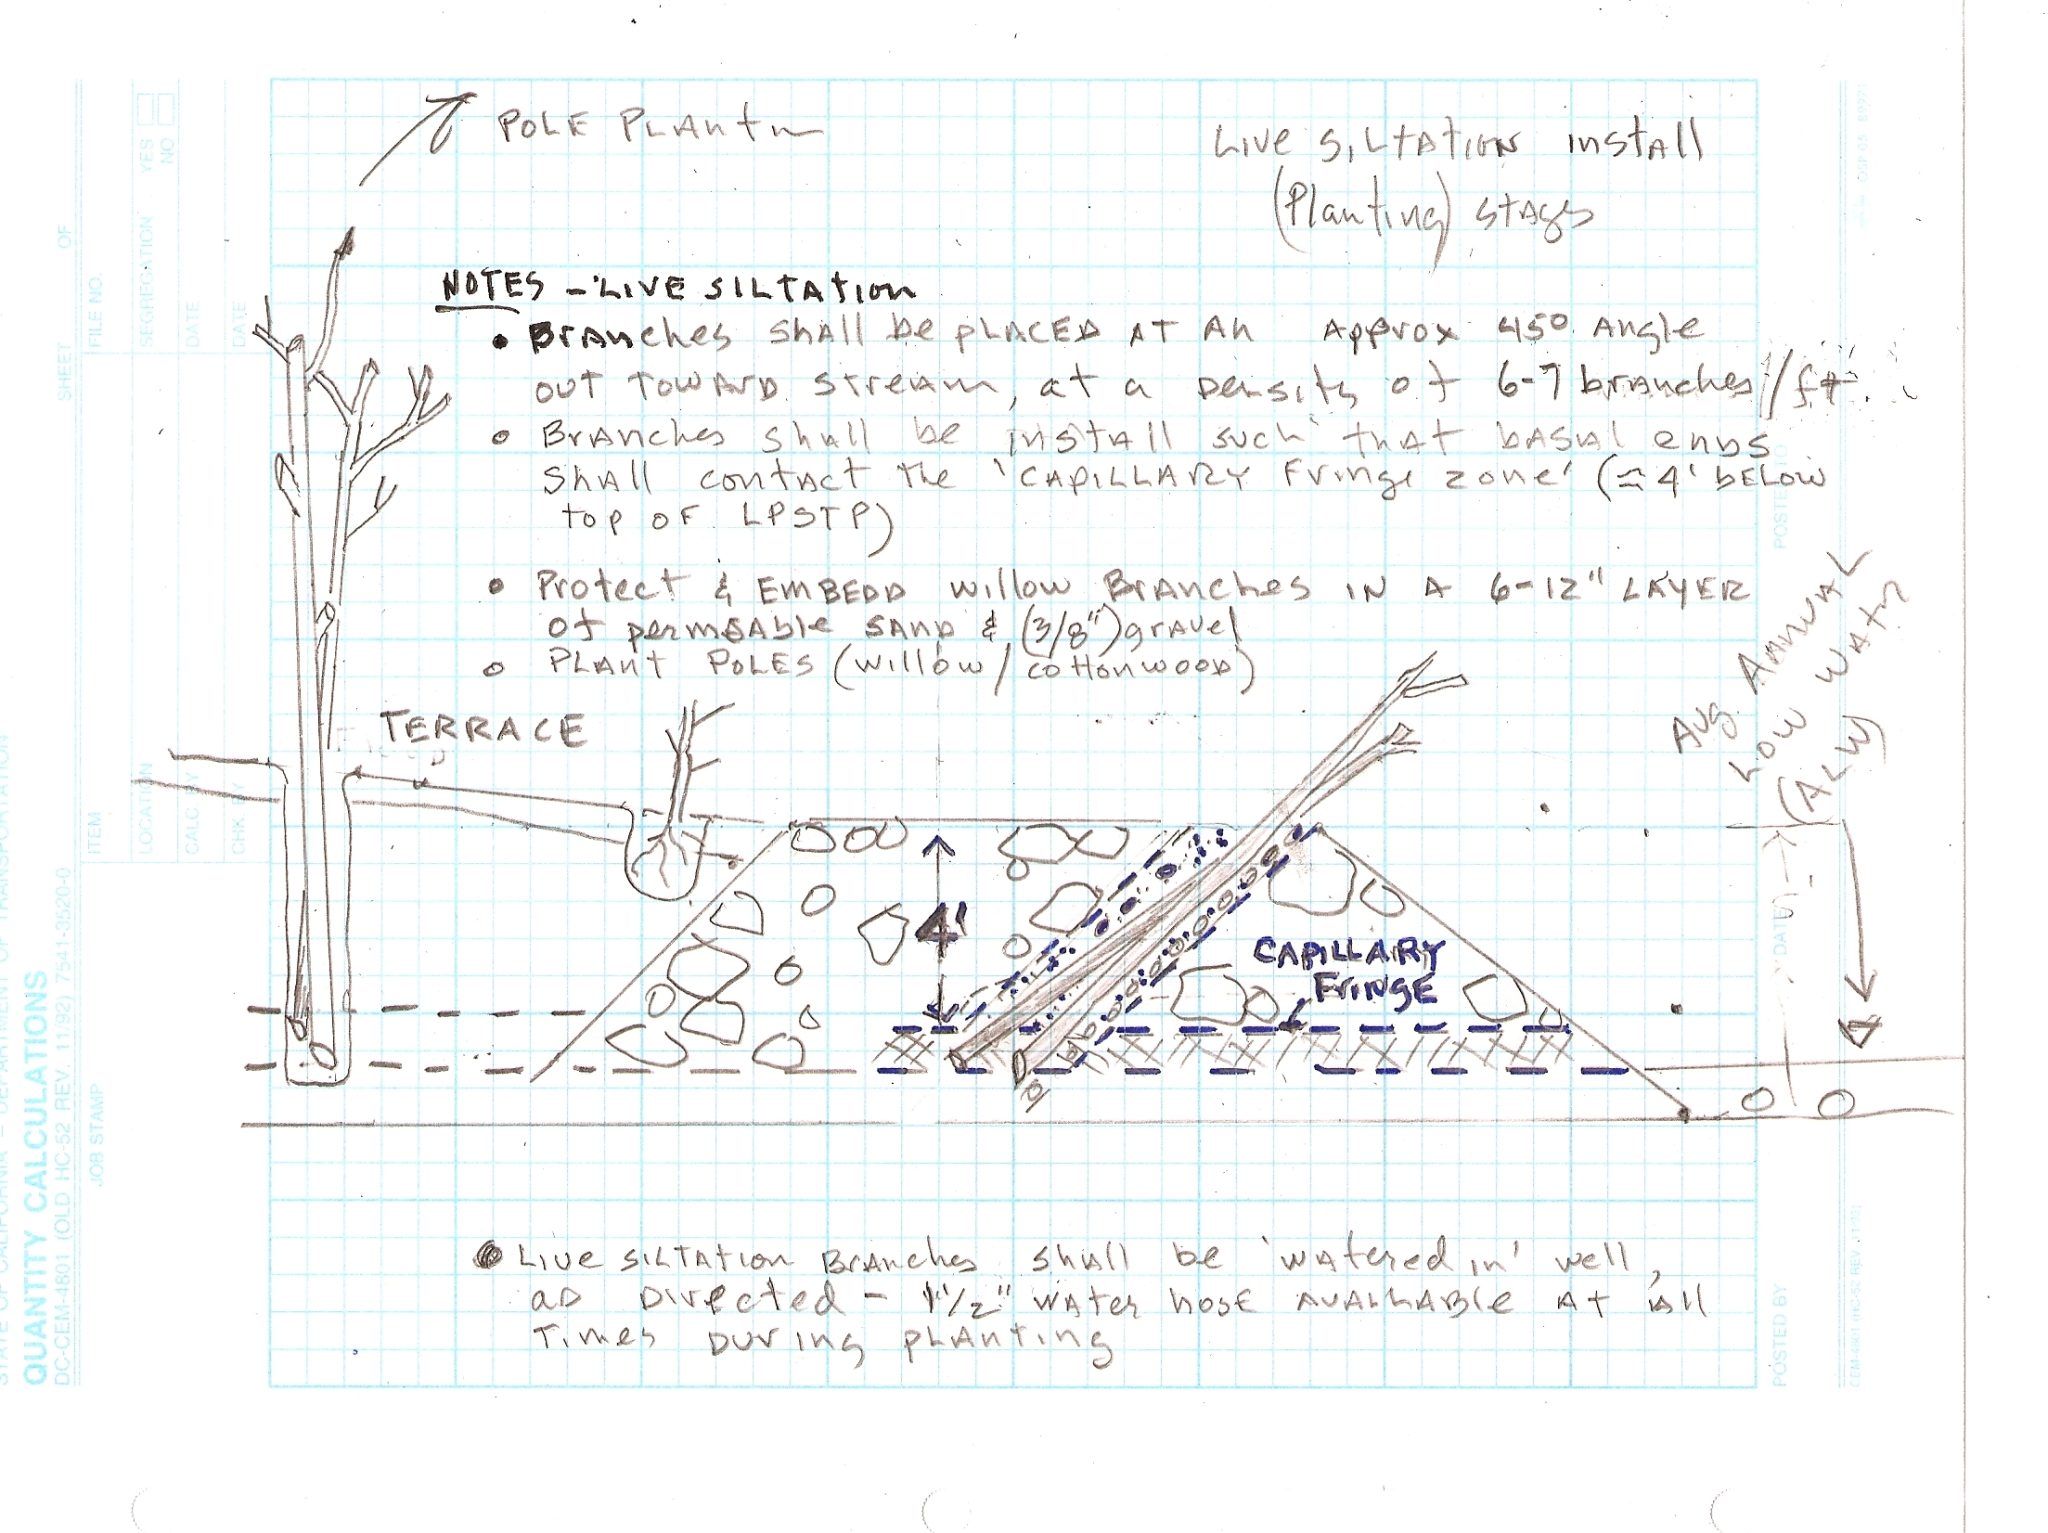
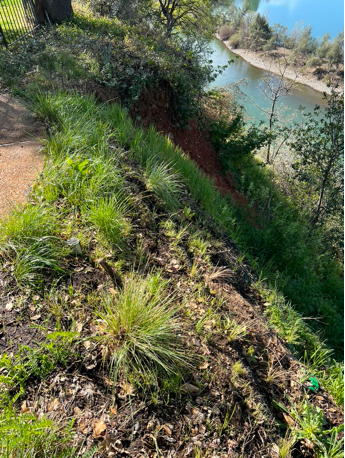
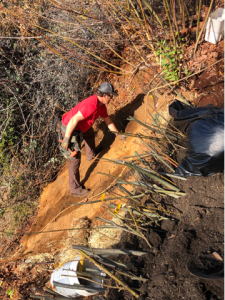
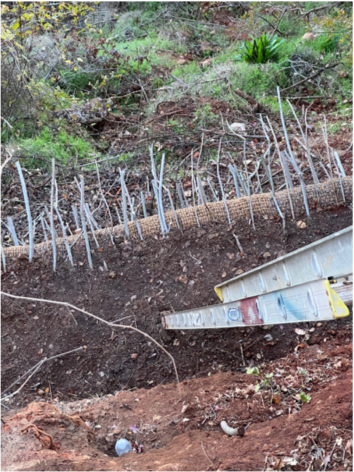
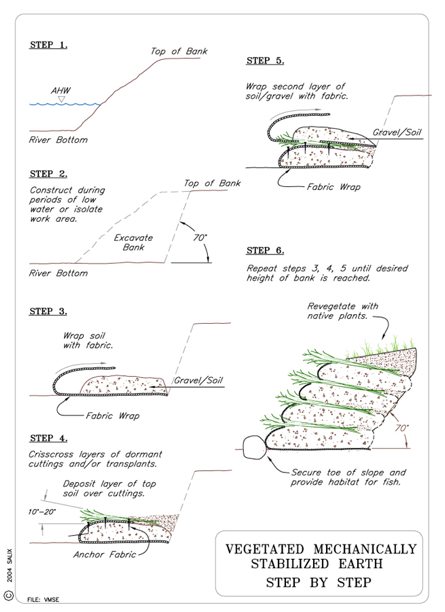
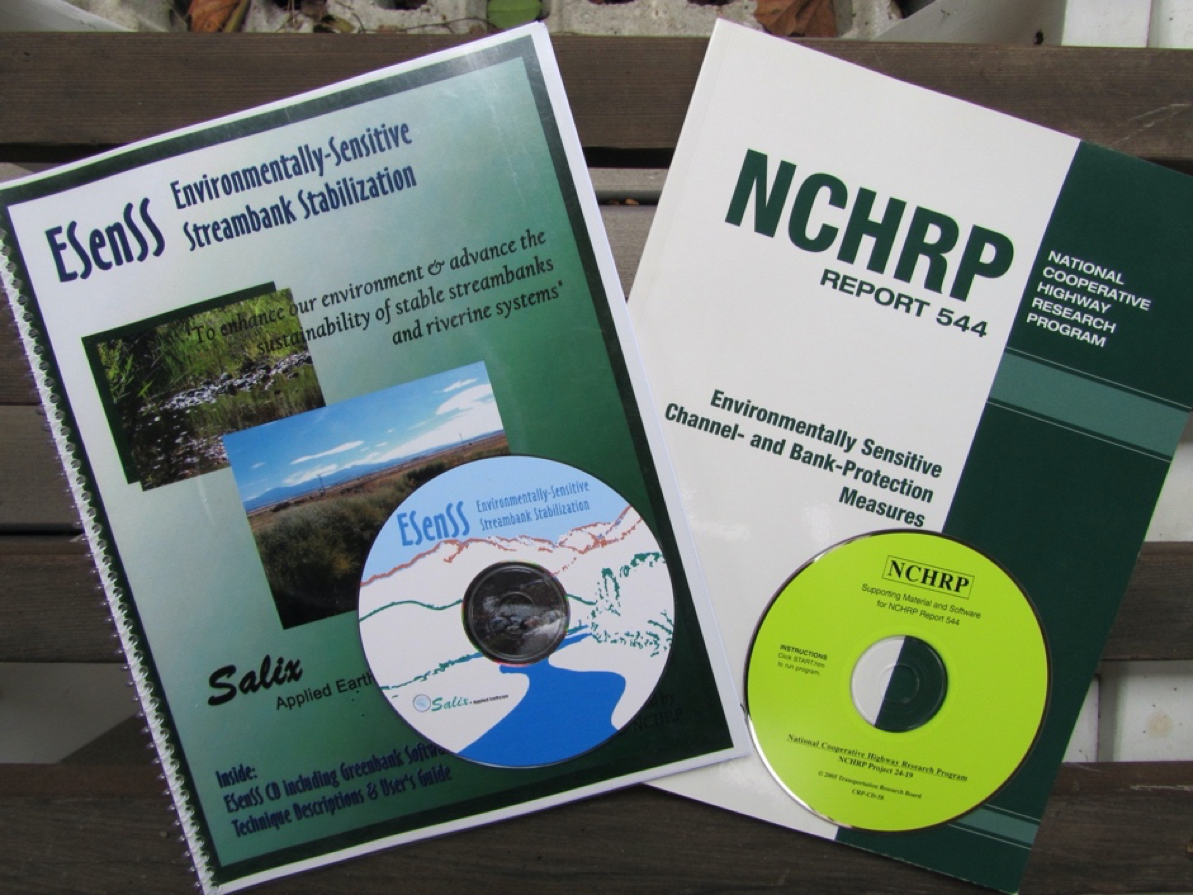
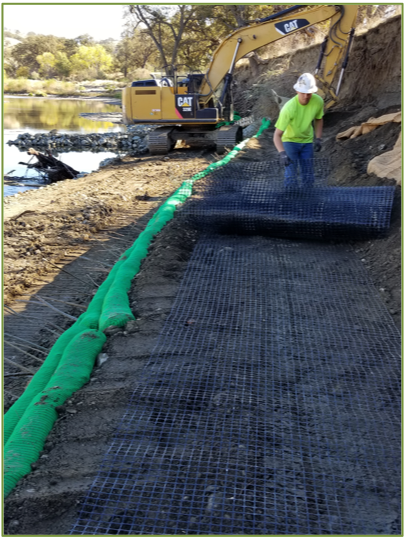
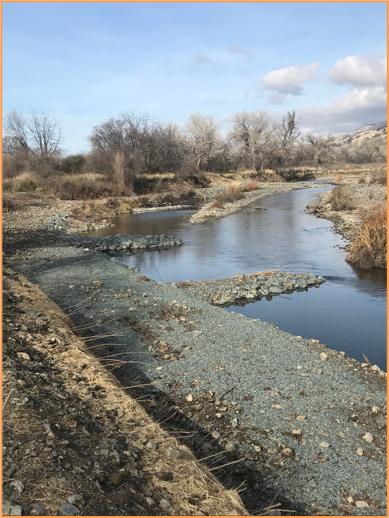
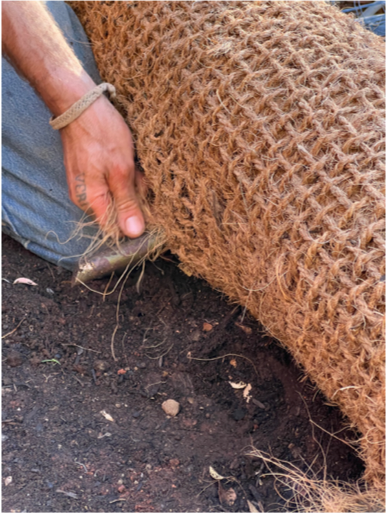
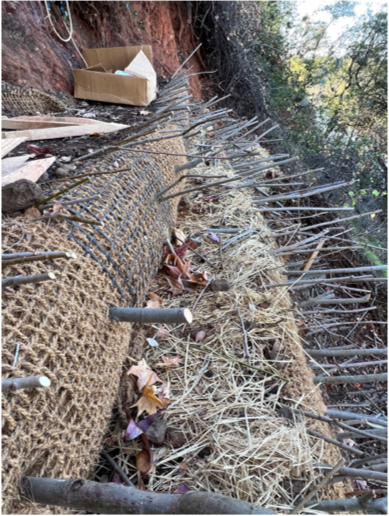
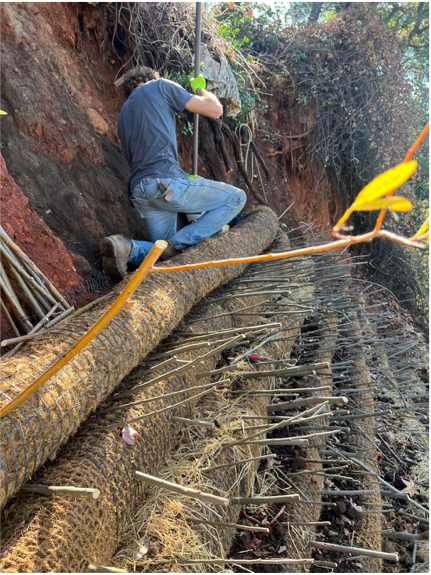
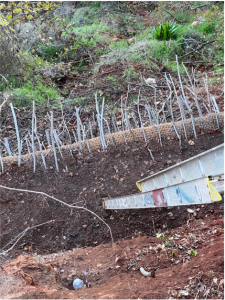
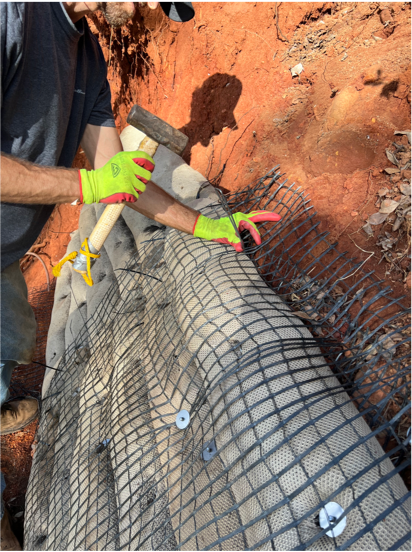
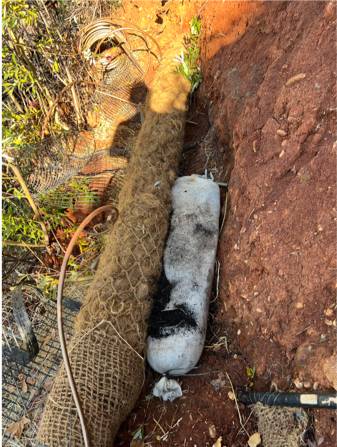
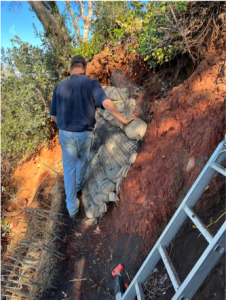
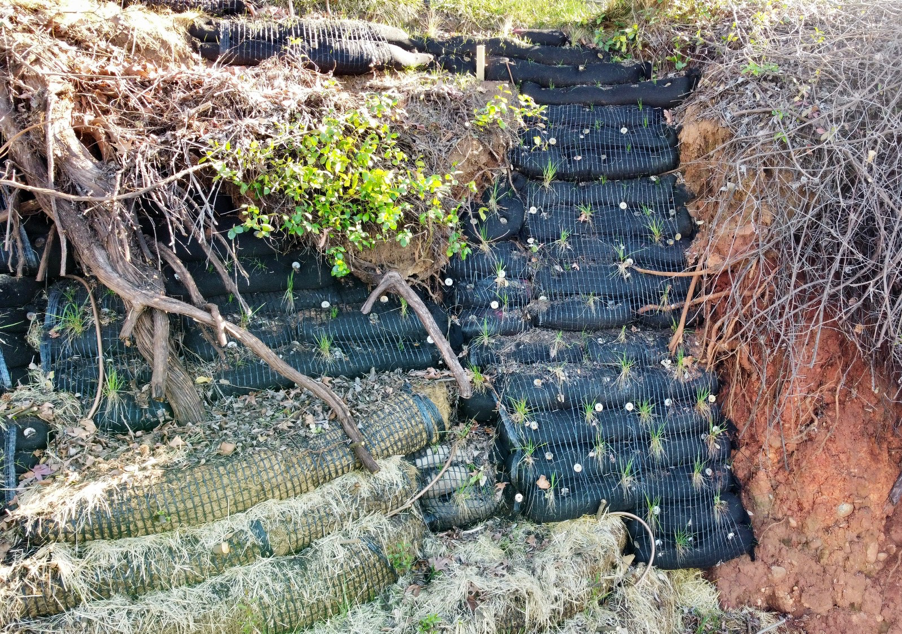
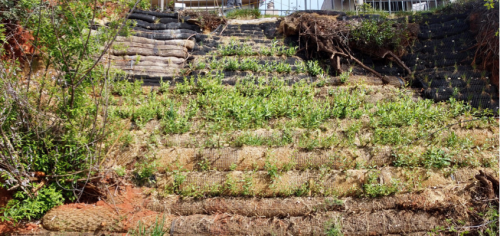
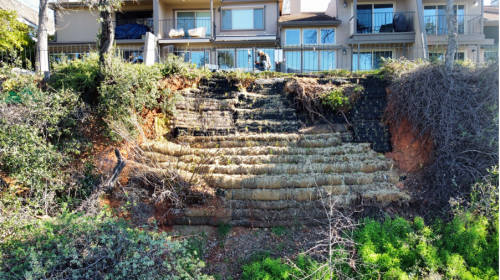
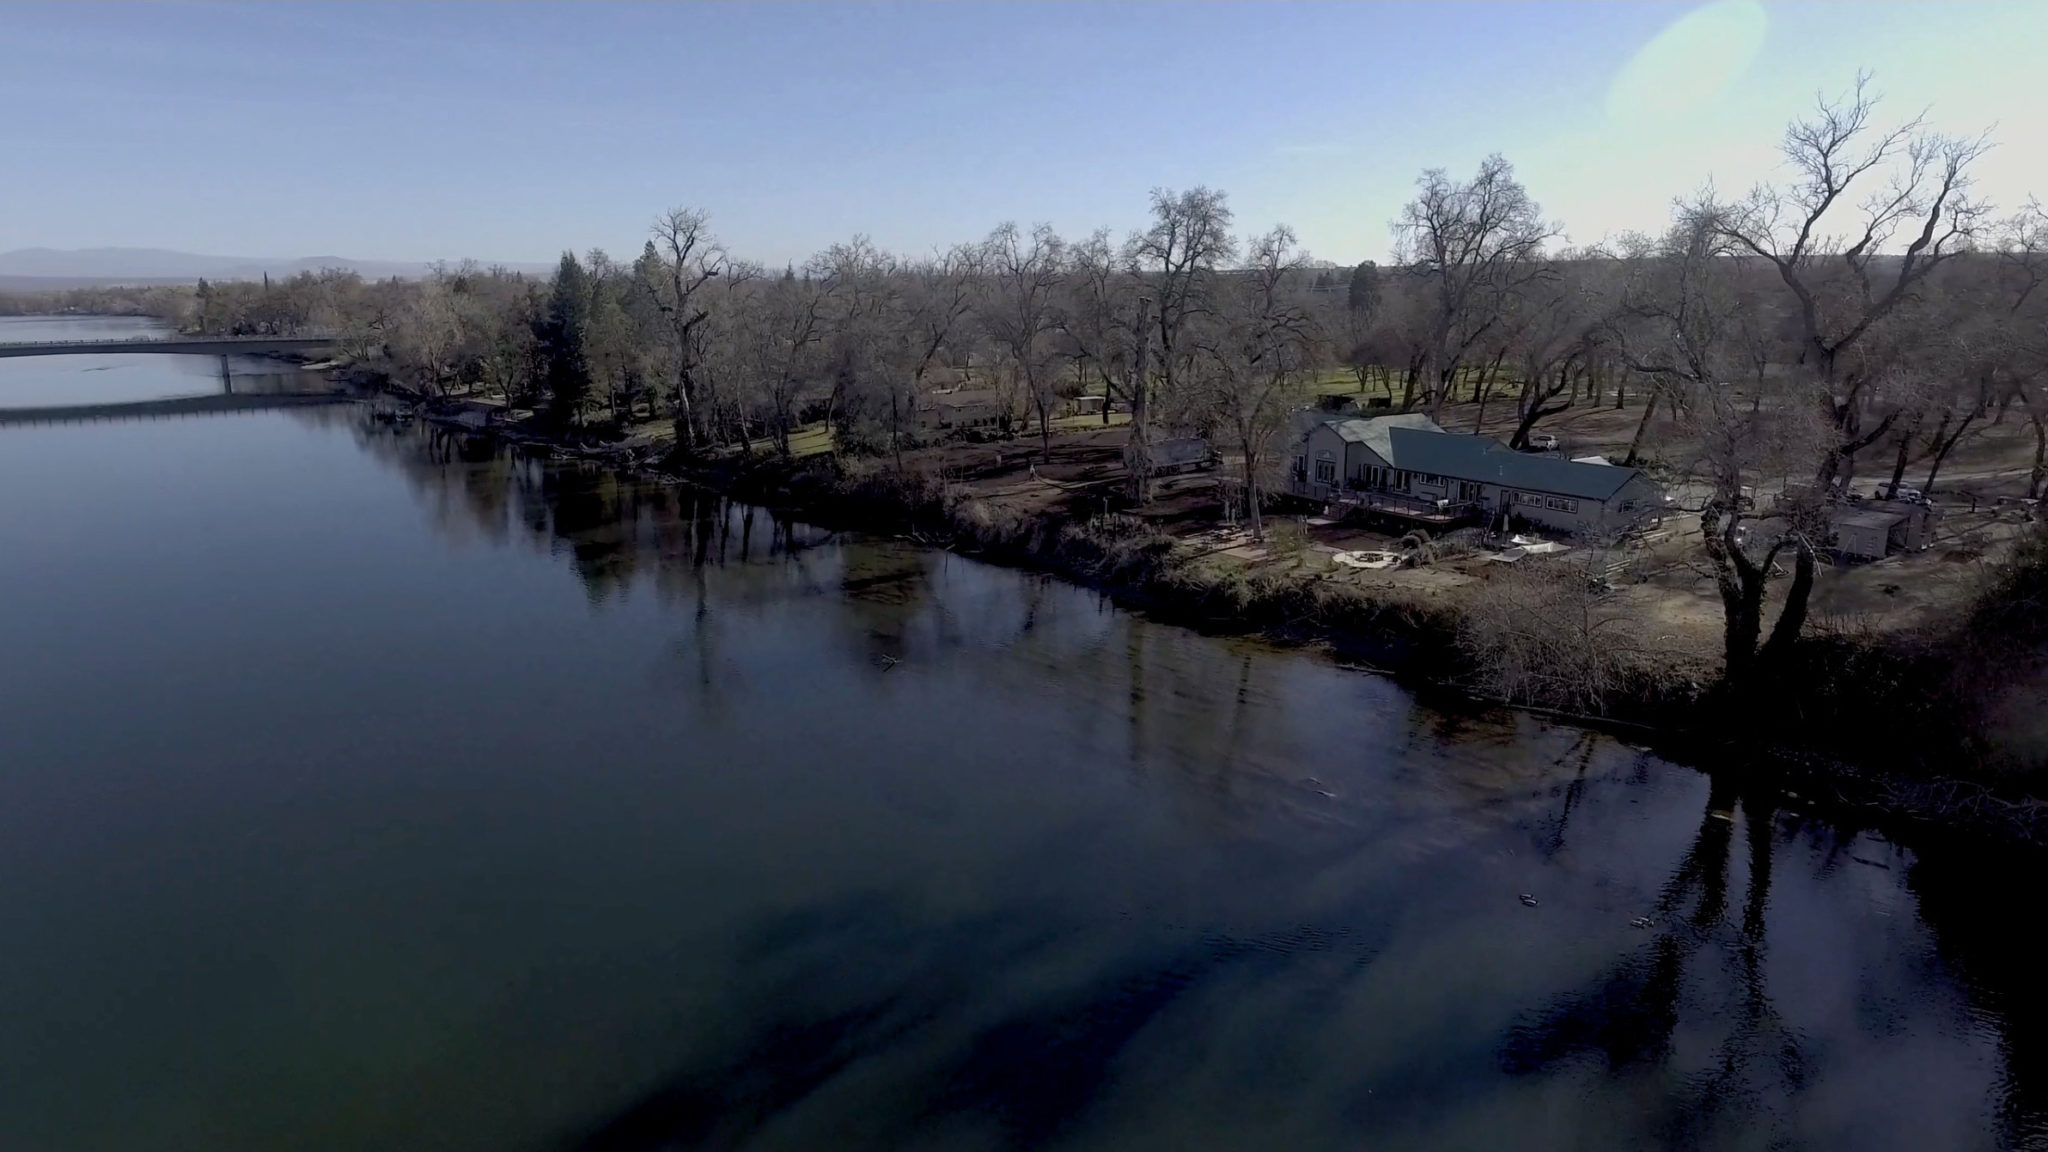
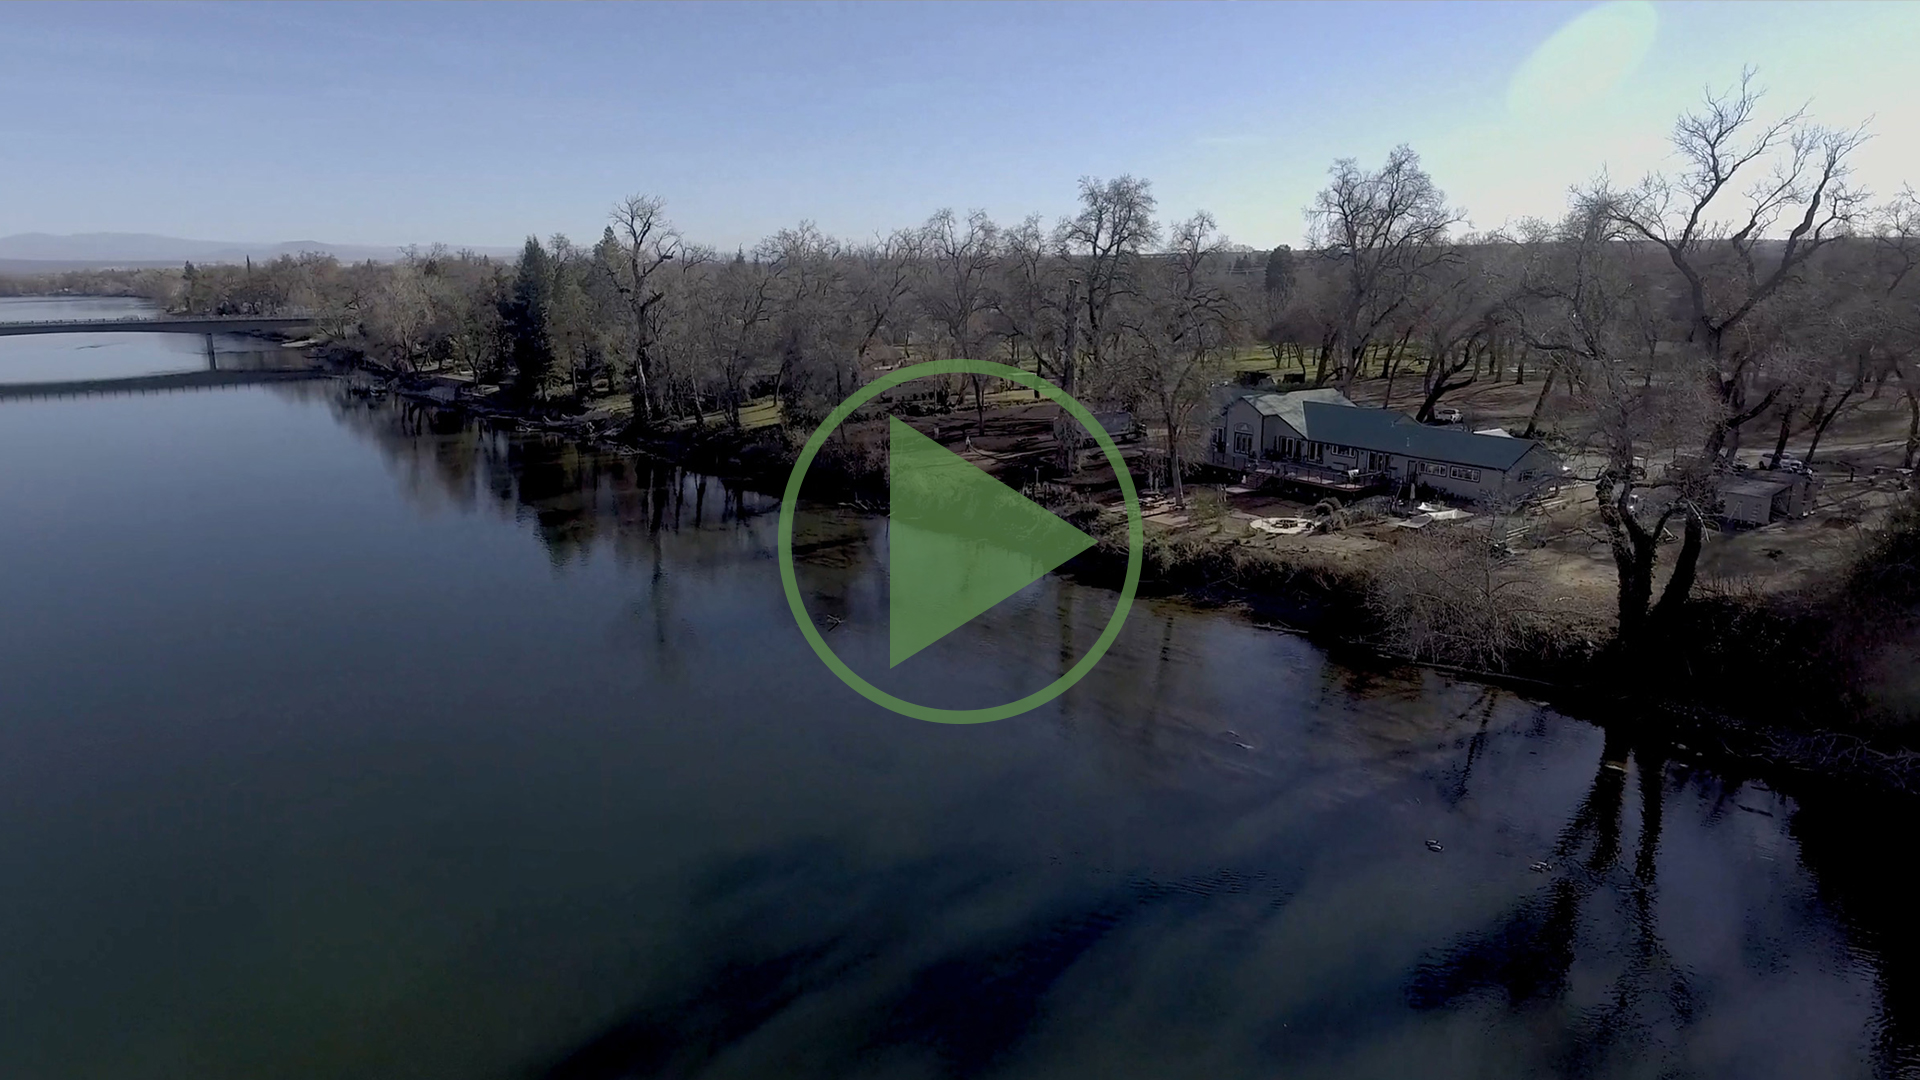
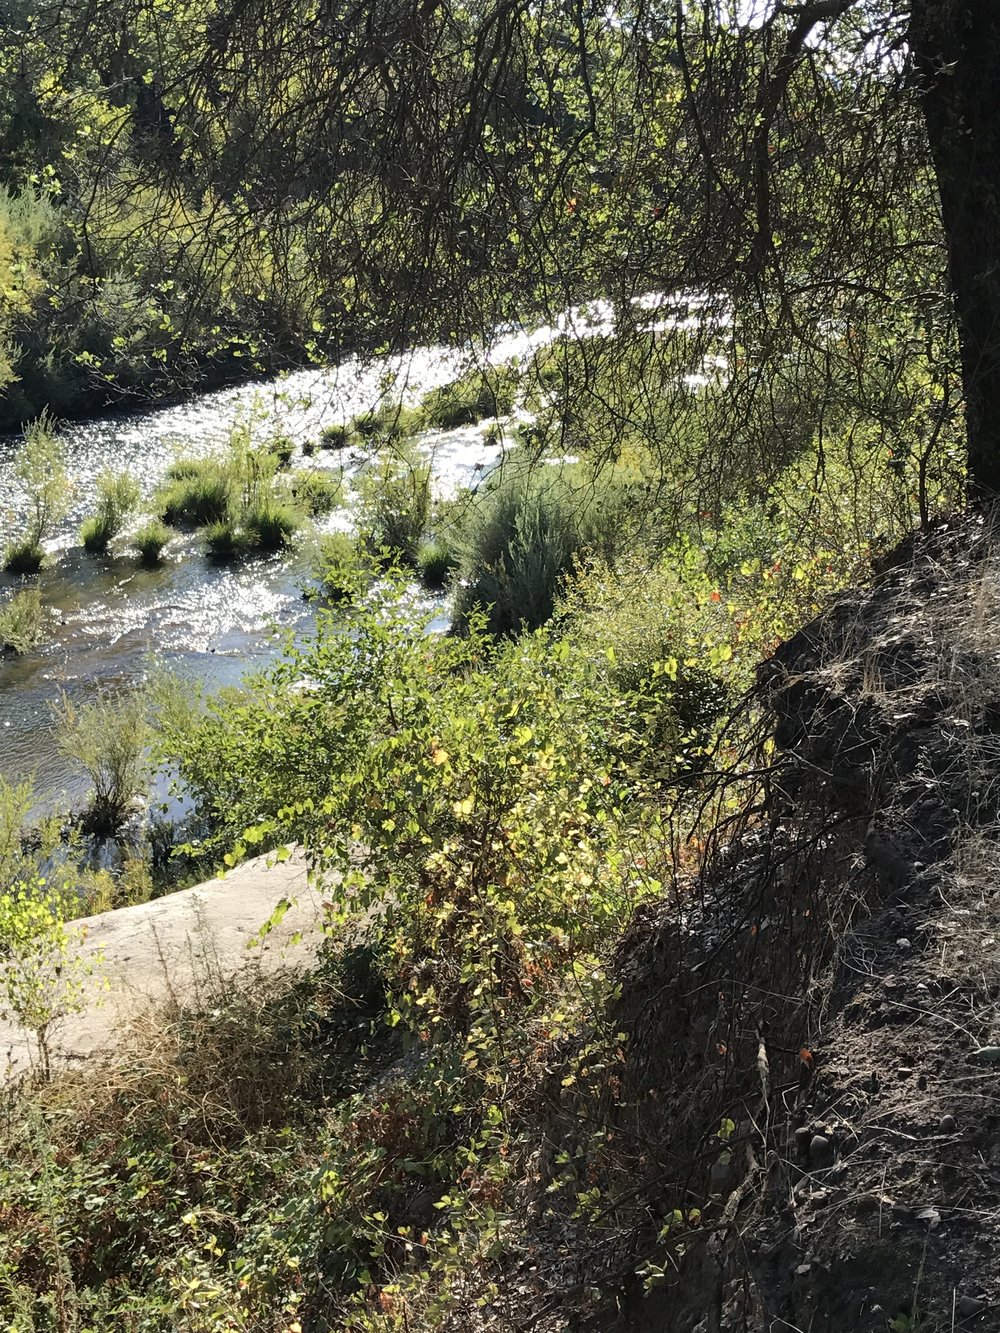
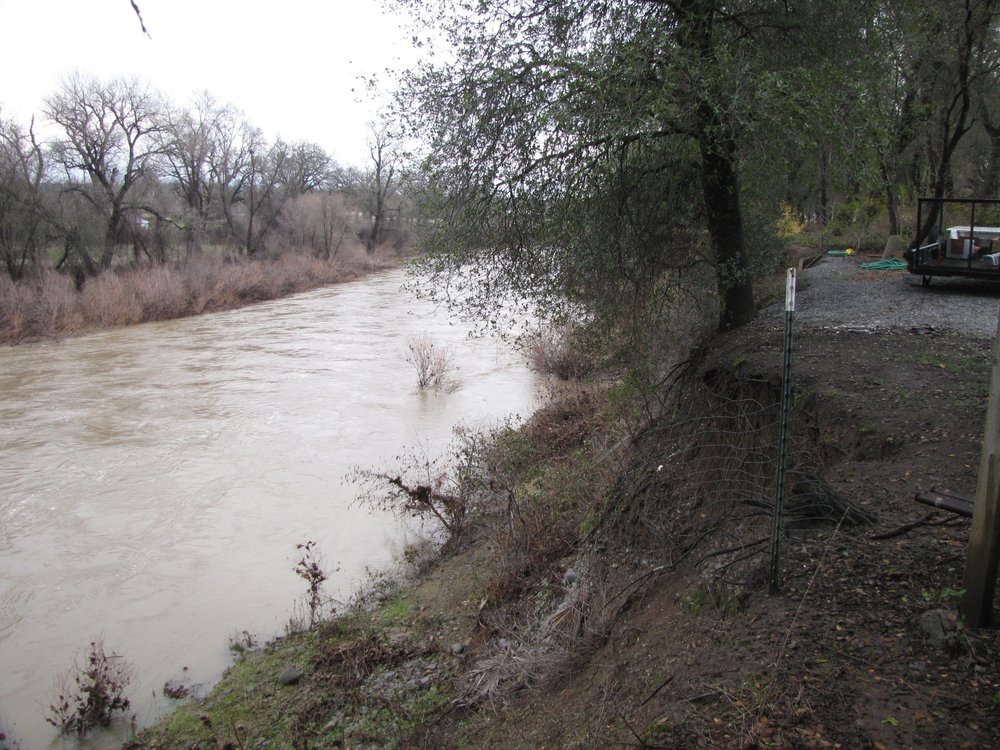
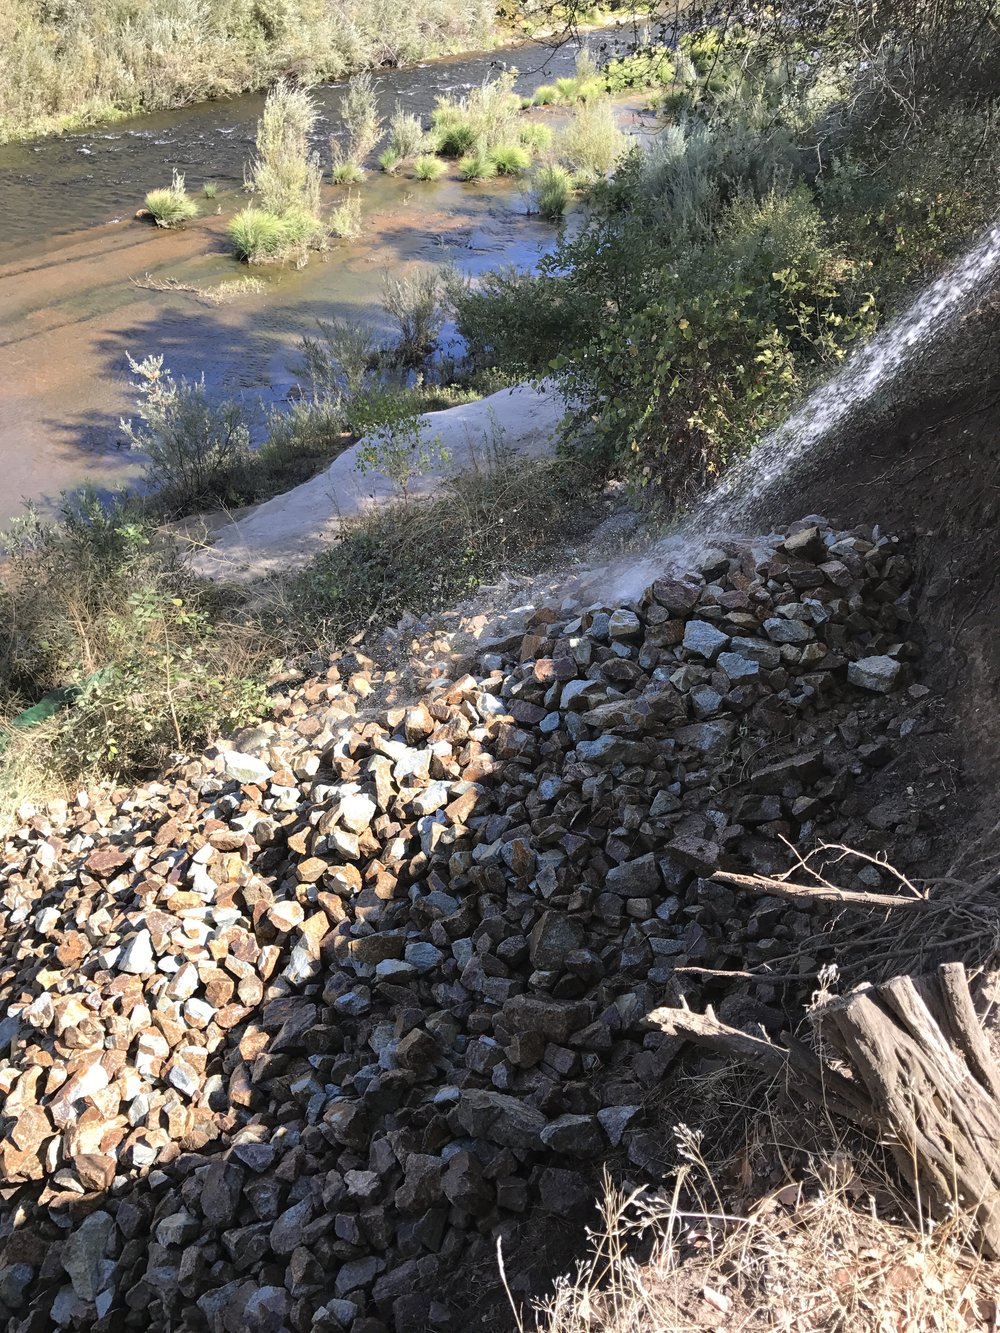
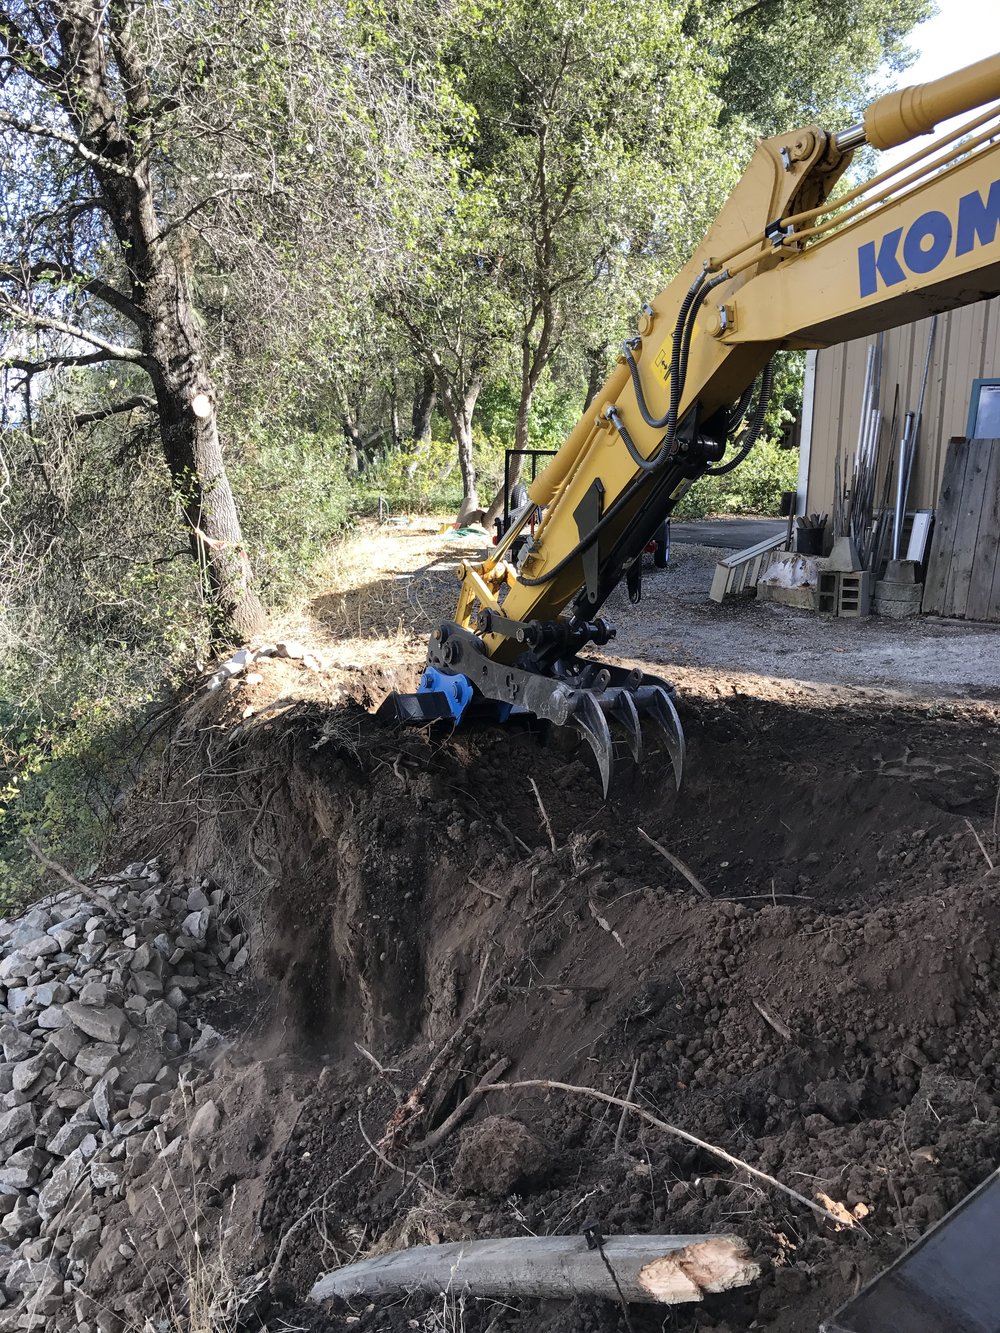
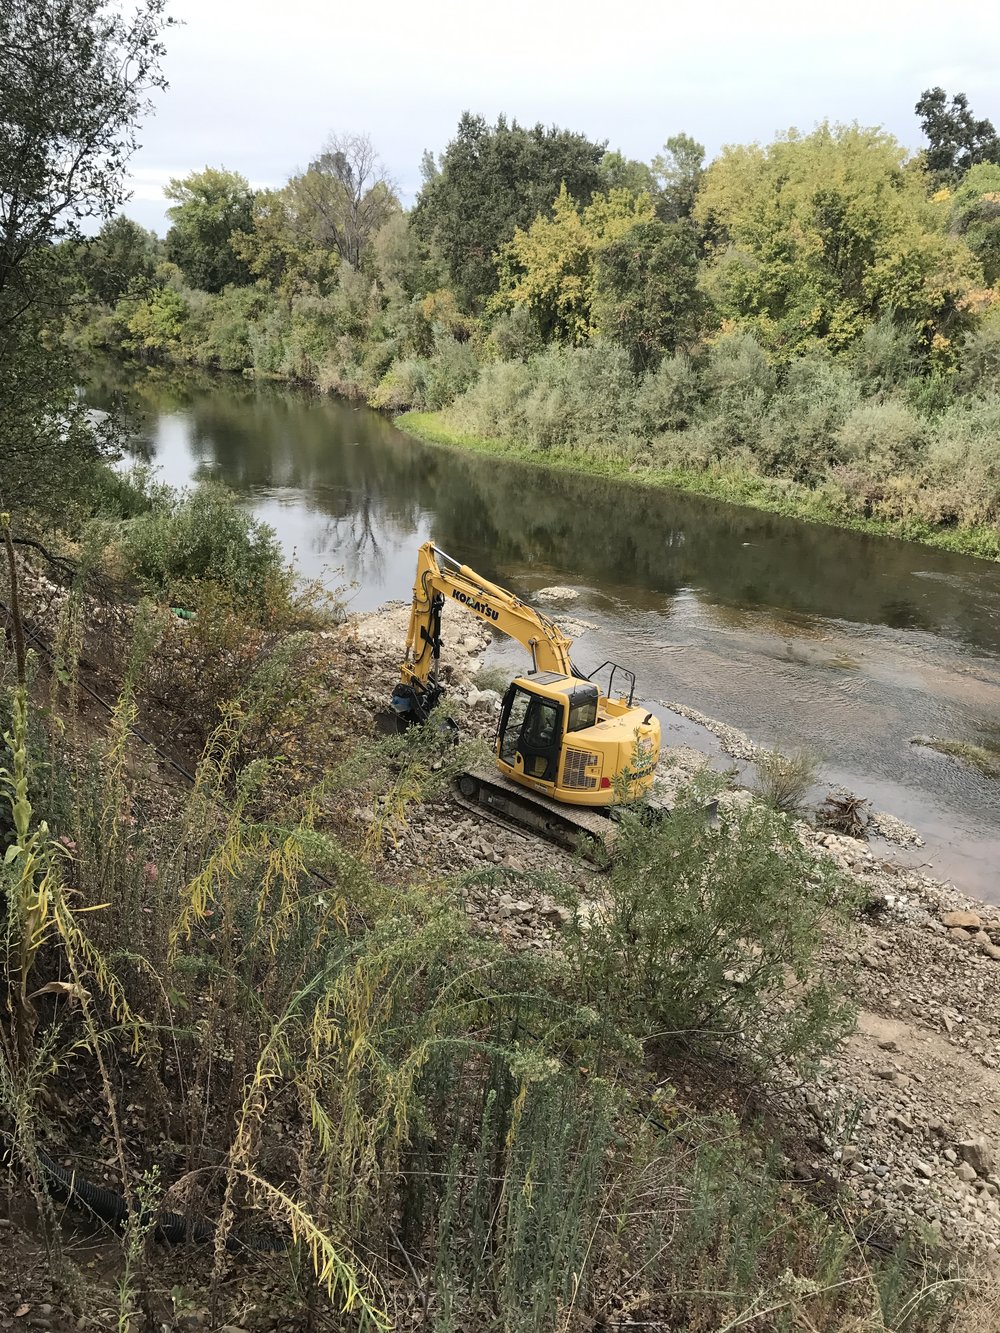
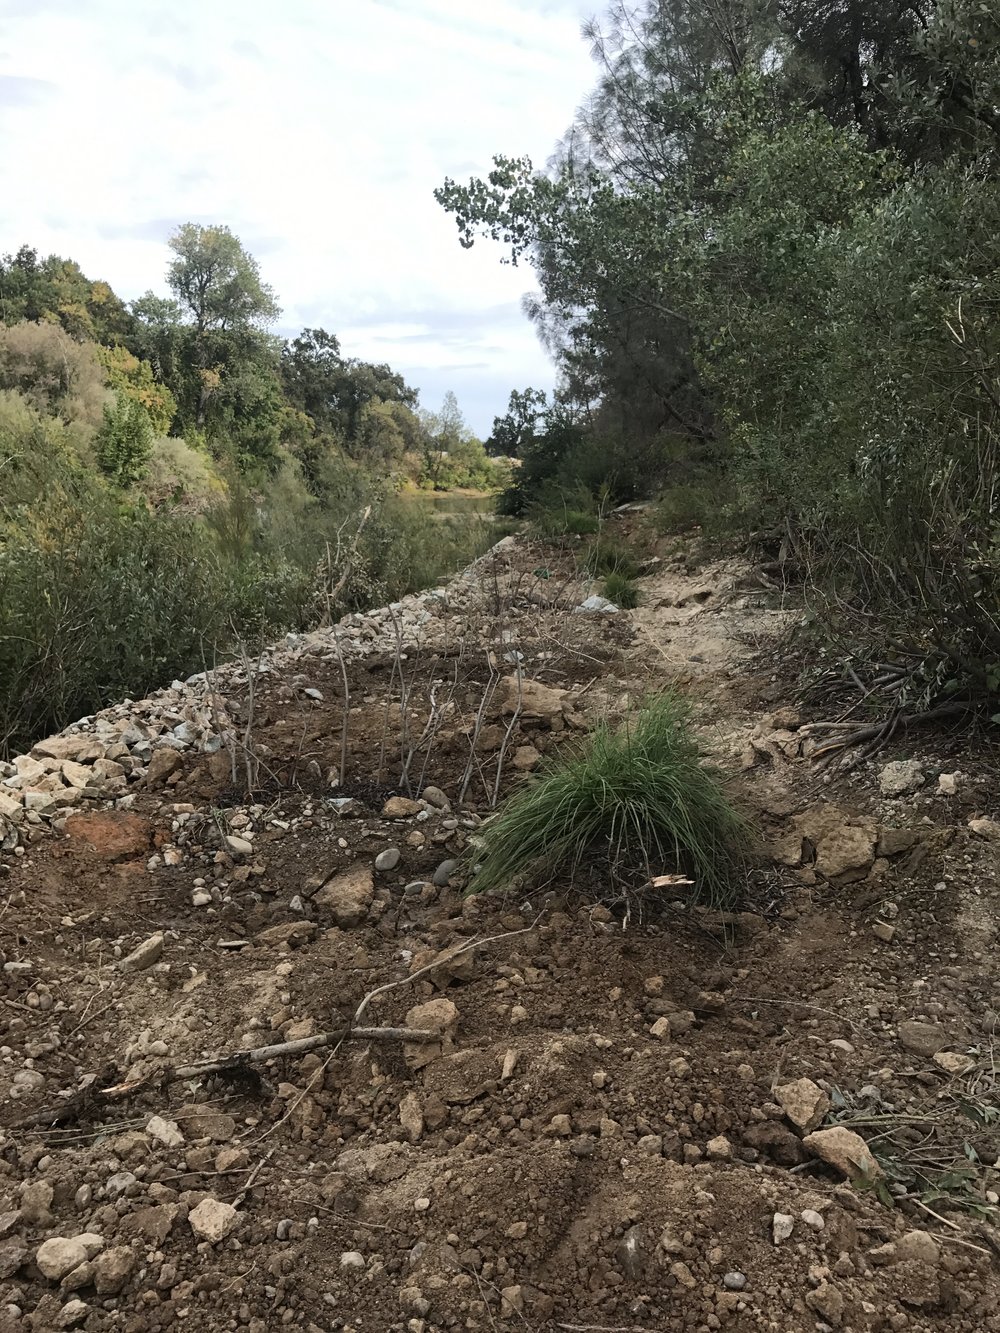
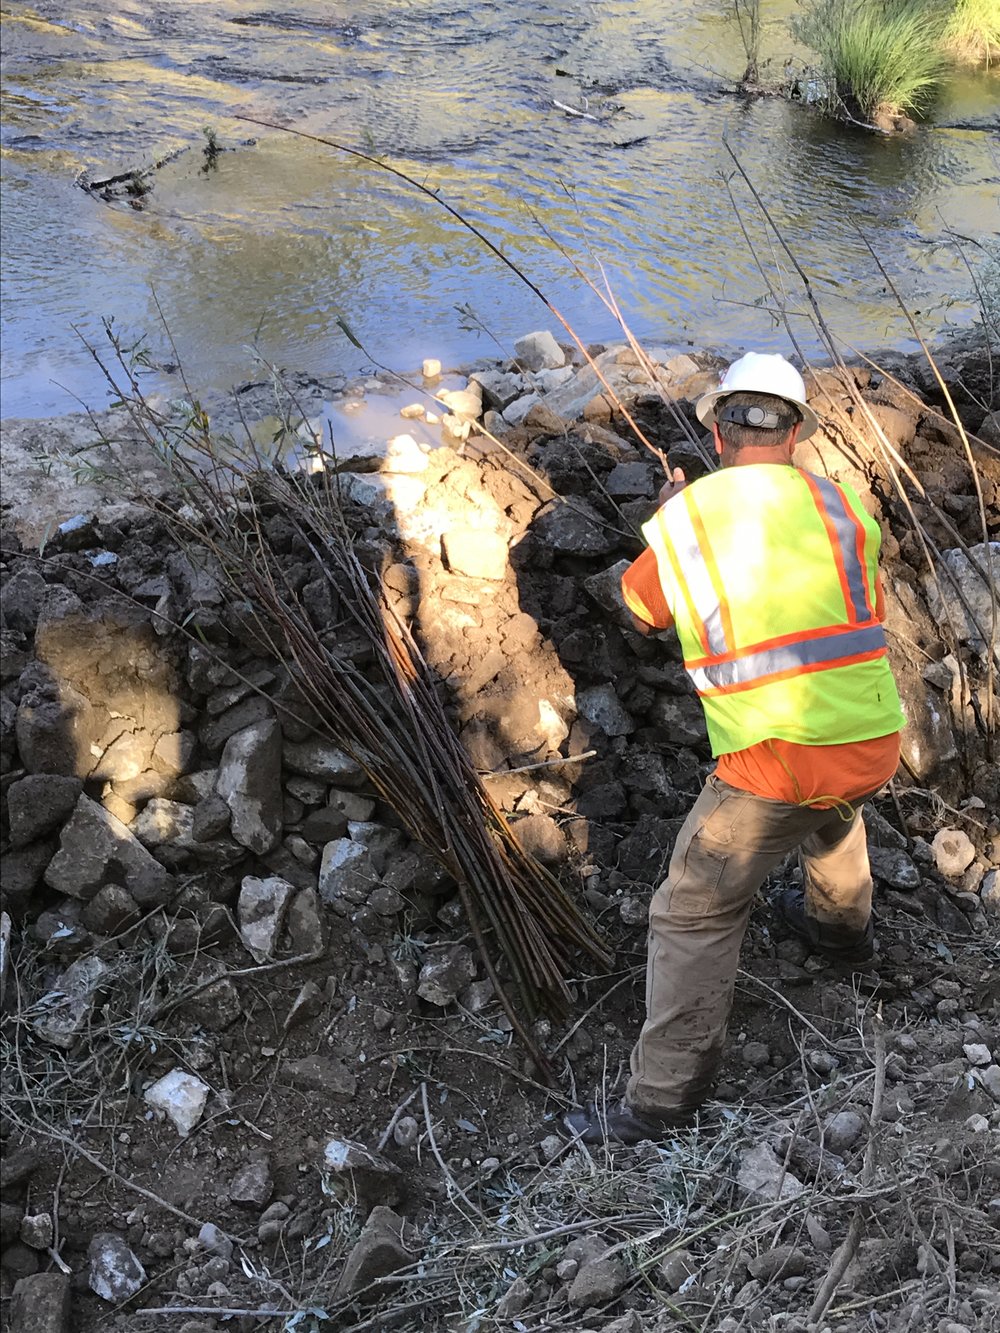
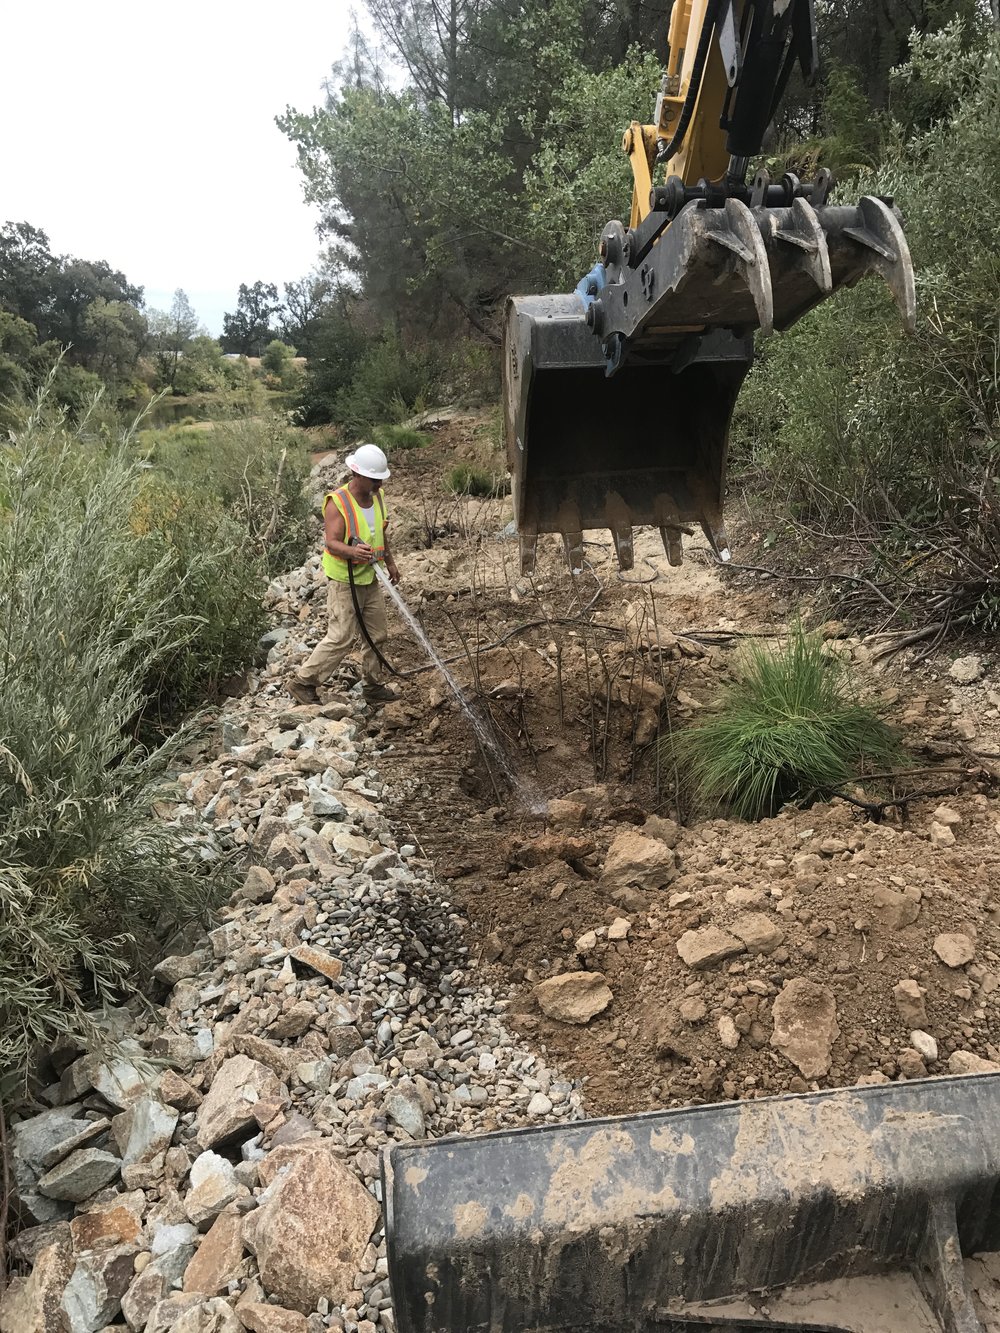
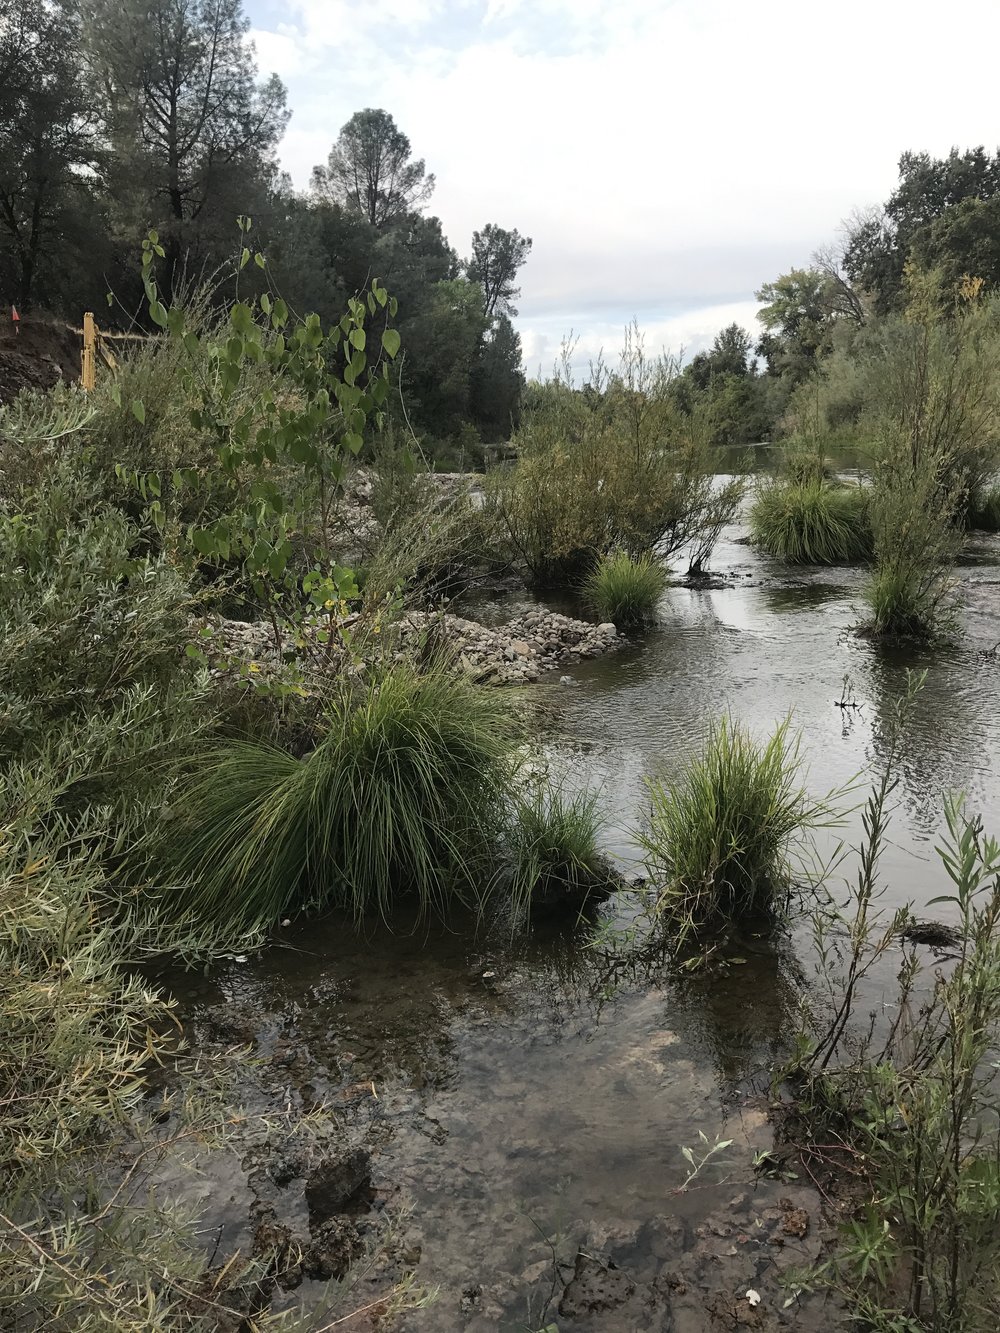
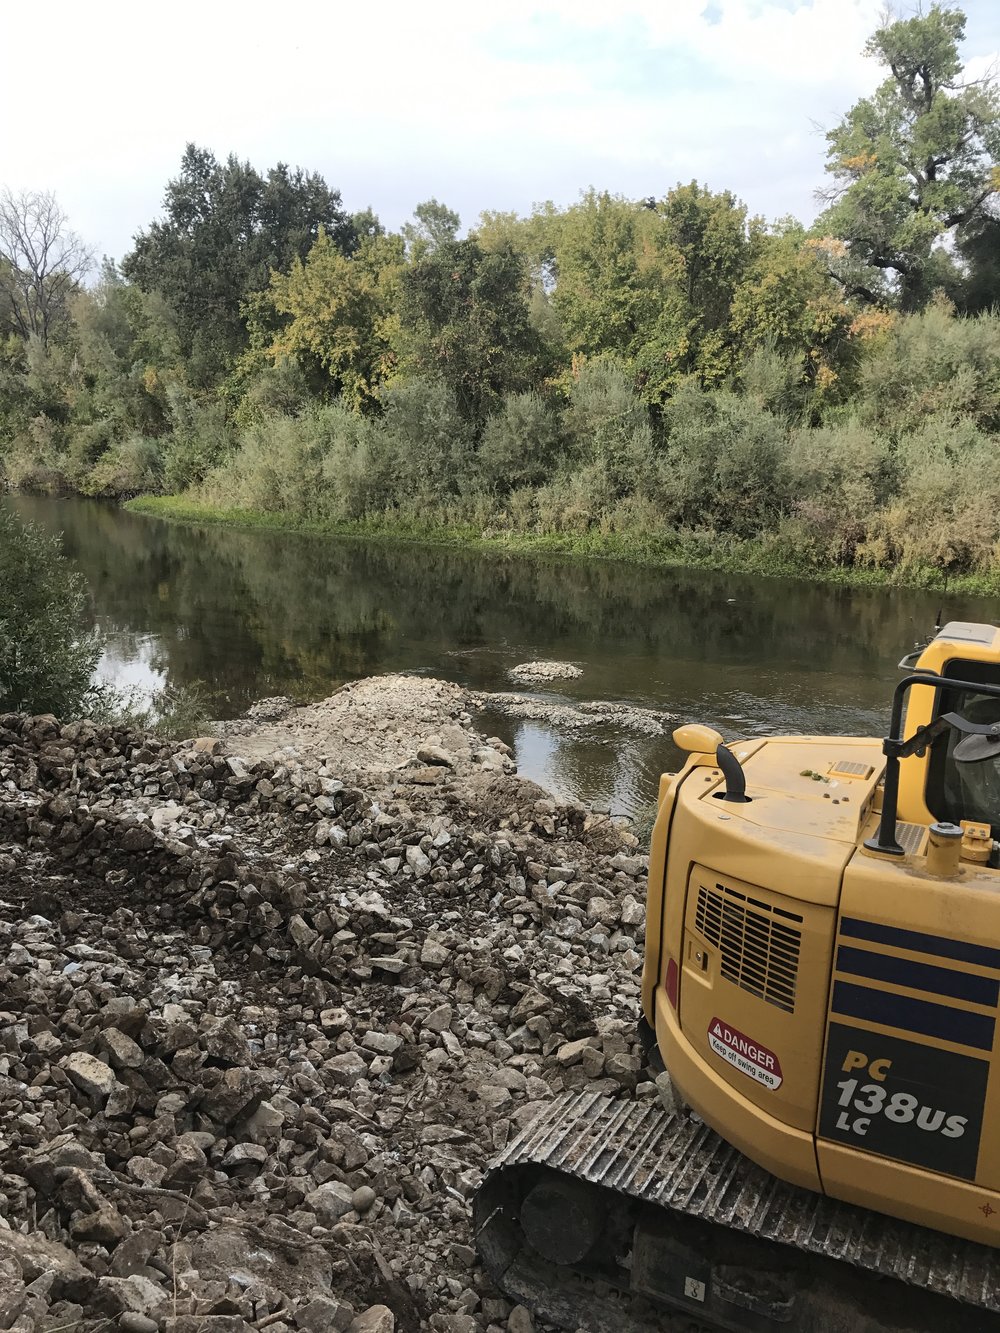
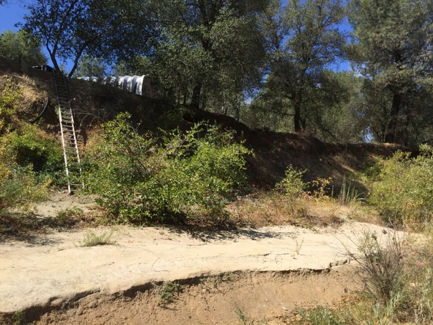
Fig.  2 Access to the work area at toe was a challenge.

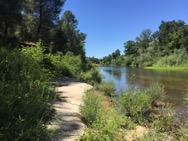
Fig.  3 The bedrock shelf and existing vegetation needed to be saved as possible

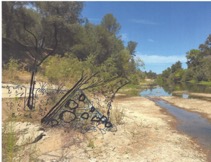
Fig.  4 Conceptual sketch of plan to protect existing vegetation, redirect high energy (thalweg) away from bank, and develop a flood terrace for improved stream function

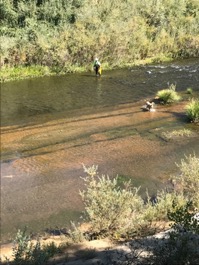
Fig.  5 Willow was available nearby

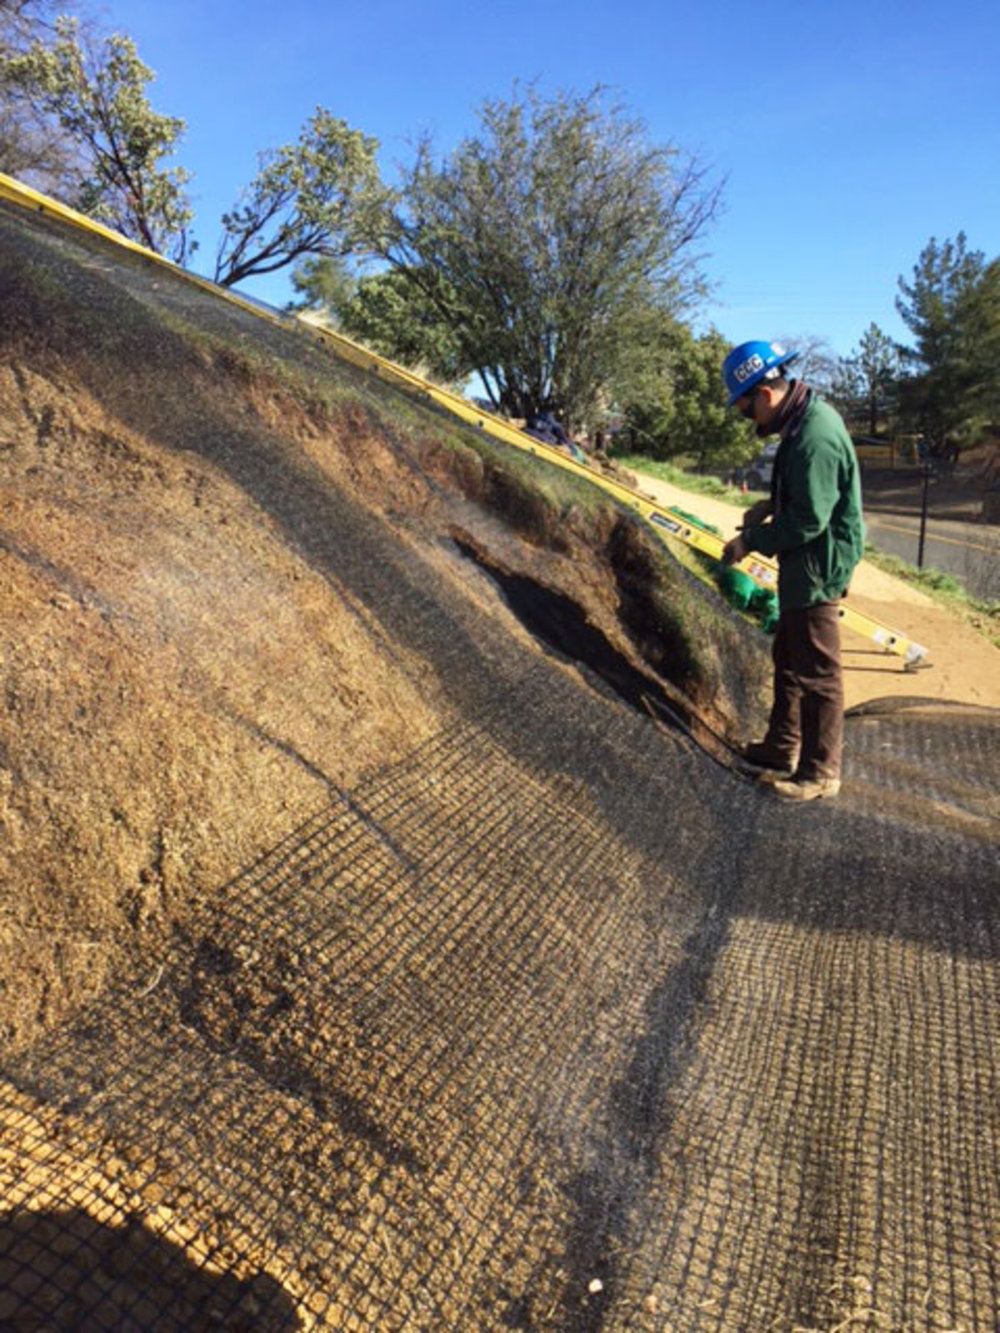
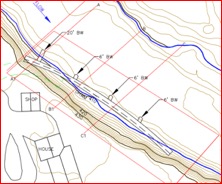
Fig.  6 First draft of the plan view.  Permitting required several iterations and explanations.  These environmentally-sensitive techniques, such as using well-graded clean stone that self-adjusts and therefore doesn’t require scour trench, is new to this area.

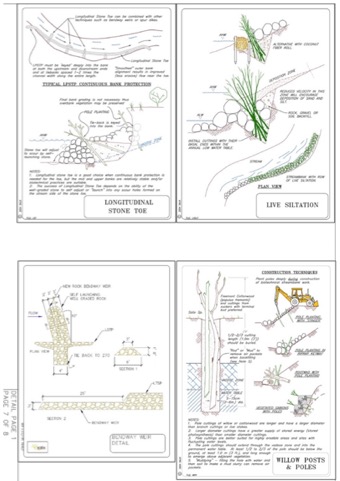
Fig.  7 These typical detail drawings, are available as AutoCad files, make the permit packages and plans easier to produce.  See Dirttime.tv store

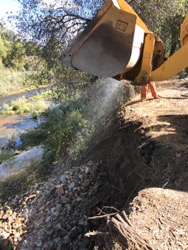
Fig.  8 Over 500T of clean, angular, well-graded, poorly sorted, self adjusting rock, as per NCHRP Report, were used.  All rock was delivered to cliff by loader while it was cleaned again.

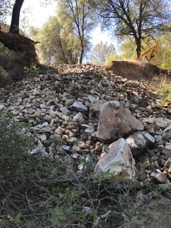
Fig.  9 This critical salmonid area was protected by water quality standards (1 NTU increase allowable for short period only), seasonal protection of songbirds, and protection and avoidance of flowing water areas.  A biologist was required to inspect the work.

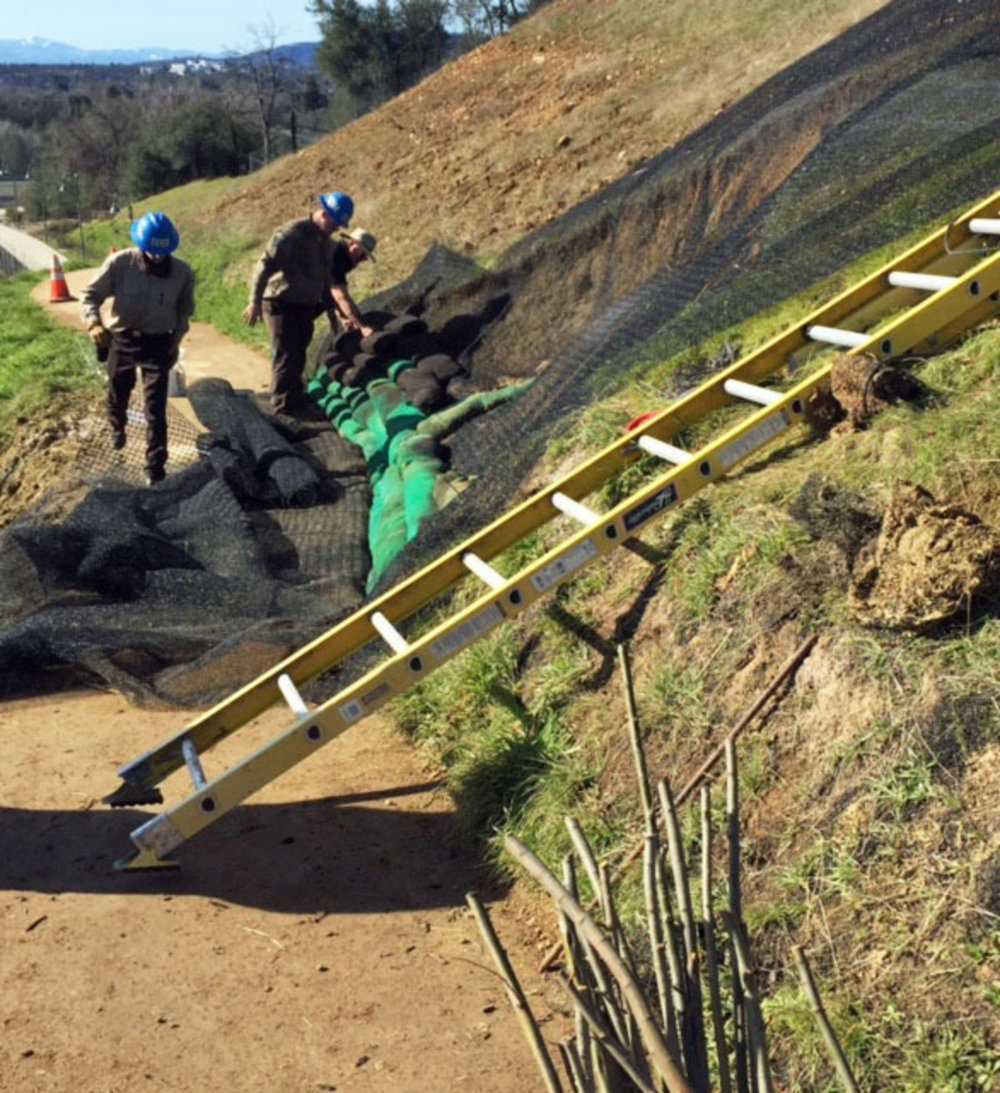
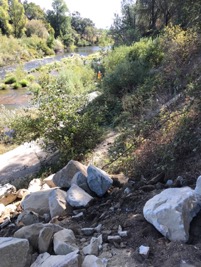
Fig.  10 The rock was down the cliff but how to get the excavator down was next problem.  Must also consider, how to get it back out upon completion!!

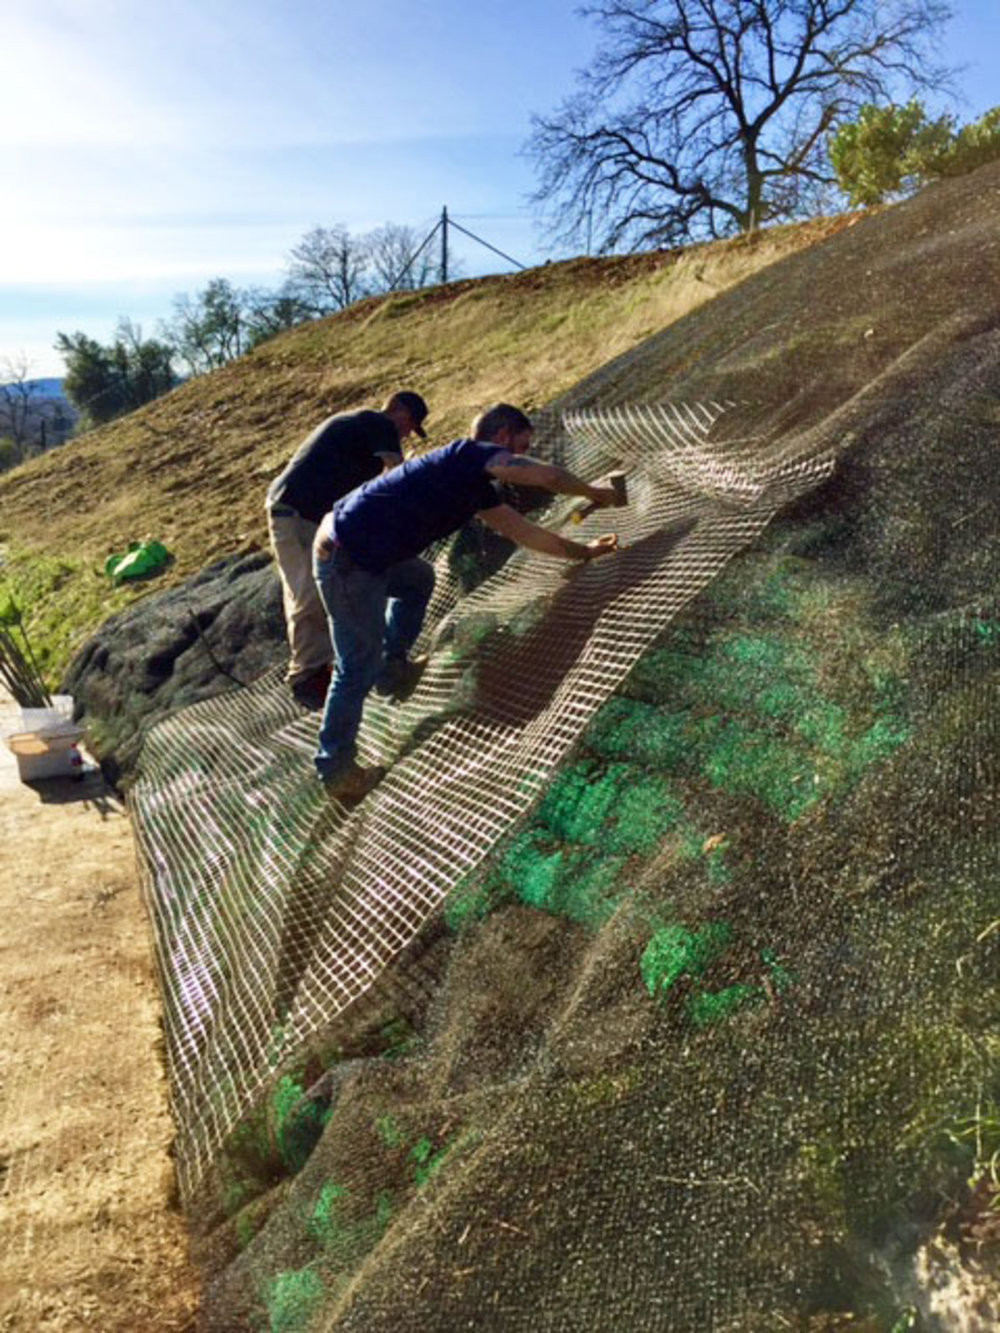
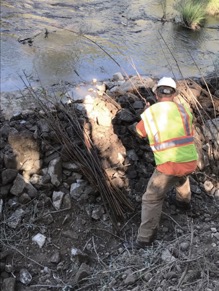
Fig.  11 Where additional vegetation was needed, we installed live willow branches, which had been soaking in the creek, as Live Siltation.  Live Siltation combined with Longitudinal Stone Toe is the most cost-effective practice,

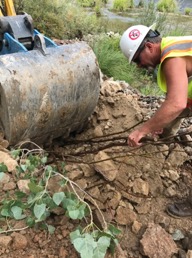
Fig.  12 Live Siltation and Live Eyebrows are revegetation techniques which cause localized “roughness” – The high stream flow will dissipate energy on the willows instead of “eating” the bank !!

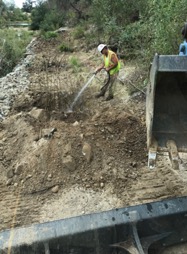
Fig.  13 Looking at and managing stream energy is like having a high energy dog.  If I don’t toss Bear a stick or rock, he will soon be eating my socks.  So ask yourself, have you given your stream willow shrubs, LWD, or gravel to pick up and transport? Is roughness available?

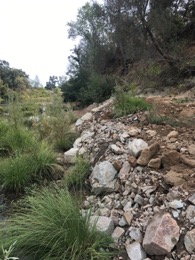
Fig.  14 Self adjusting rock gradations allowed the placement of protective stone around existing plants

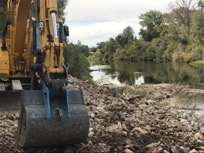
Fig.  15  This project afforded 300-LF bank protection in an environmentally-sensitive way.  Ultimately, by intentionally restoring stream function, we were able to design, permit and build at about 1/3 the cost of riprap.  This finding is consistent with ESenSS.  Note upstream-angled Bendway Weir.  The BW will be under water during high flows but redirect the flows, like an airfoil, toward the center of channel.

Fig.  15 Flood terrace upon completion, Oct. 1, 2017

Fig.  16 The same flood terrace view taken in March 12, 2019.  This terrace had been under water, experiencing about 6-8 fps, for the last three weeks.

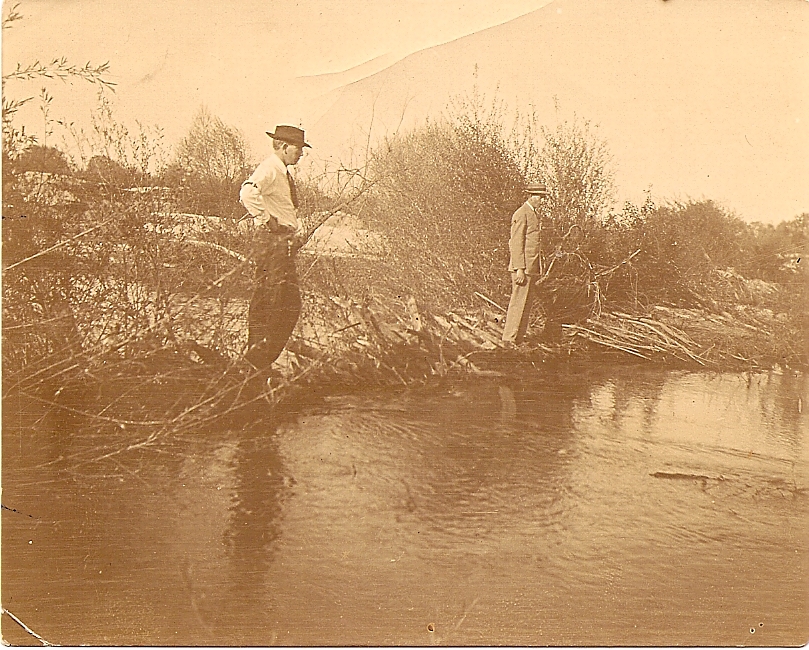
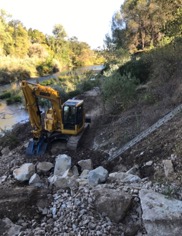
Fig.  17  Site nearly completed in 2017

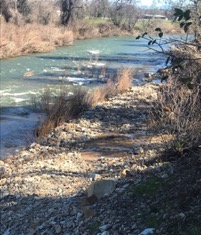
Fig.  18  Photo taken March, 2019 after inundation by very high flows

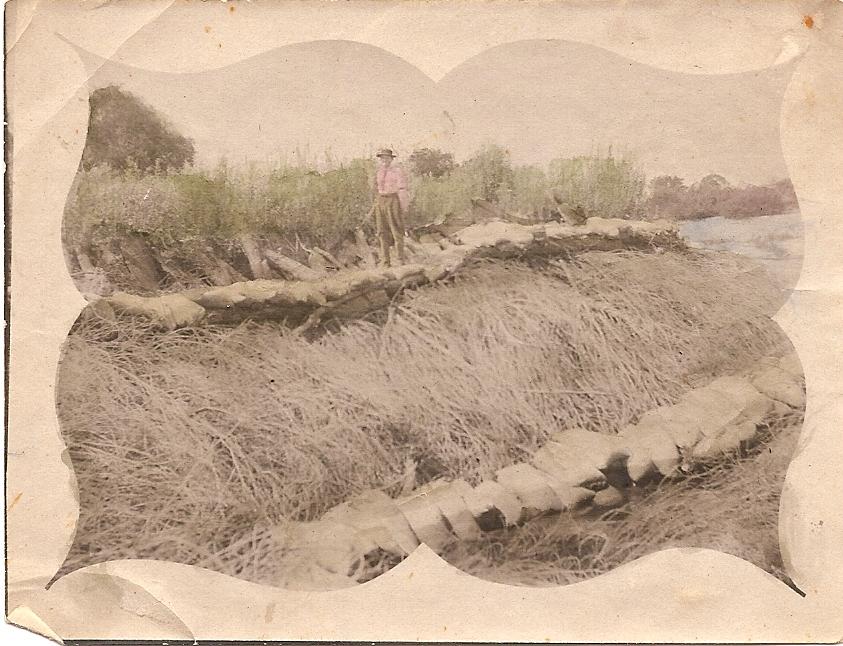
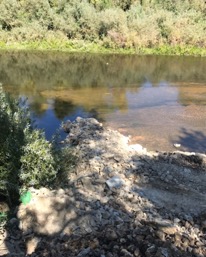
Fig.  19 Here is the upstream Bendway Weir in 2017.

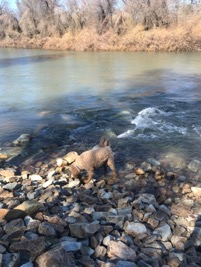
Fig.  20 This photo, taken March 2019, after 16 months, show the Bend Way is still functioning!  And Bear is dissipating his energy on a stone!

Here is a picture of my Grandpa John McCullah and his brother Ed BIOENGINEERING the eroding banks of the Kings River, near Hanford CA, back in the 1910s !!

Also look at the second picture of them “checking out their work during the floods.  That is a sign of a “good practitioner”, one who visits the site during storms to see what can be improved upon.


At that time, little did my granpa know I’d be doing similar work a 100-years in the furture. This type of construction for slope and streambank stabilization is keenly intersting to me.  I have been designing and implementing projects with these methods for over 20 years now.  I started with the willow “live” stake, then did everything with the “willow wattle”.  By the way, do you know where the term STRAW WATTLE originated ?

Later I became interested in “Live Brush Layering”.  This webinar really covers the key priciples and concepts about BIOTECHNICAL SOIL STABILIZATION that I have learned over the last 20-years.

I have built projects using these naturally-occuring and sustainable methods in Canada, Alaska, California, Kansas, Malaysia, and New Zealand.  Learn more about Bioengineering, where and how did these evolve. 

https://ieca.learnercommunity.com/products/1150/bioengineering-and-biotechnical-soil-stabilization


Repairing a huge landslide (the “Big Sandy”) in Seschelt BC back in 1999.  Using Willow Wattles and Brush-Layered Toe Wall.


Did you know that Caltrans published a Manual in 1950, which detailed the use of brushlayering and willow “wattles” for building highway embankments and fill slopes.


This highway manual was preceeded by the work of Charles Krabel, circa 1937, Landscape Architect for Forset Service in So. California.


Learn some of the history of Bioengineering in the west.


How do you build fill slope embankments steeper that the angle of repose?  Engineering principles say to mechnanically reinforce.  Learn how to combine naturally-growing materials into your desigm, biologic materials that CAN continue to grow soil reinforcing roots that help not only stabilize but also reduce pore pressure on wet slopes!


This Webinar will also discuss topics in Natural Succession and the value of “mimicing” natural systems.

This program is a must for those of you who are challenged to knowlegably offer justifications for adding bioengineering compontnets to your projects.  Also a “must” for those who want to see case studies that describe successes (and some failures) on projects that have survived the test of time.

This webinar will be super interesting to those of you already familiar with Bioengineering but it is also intended to give you a huge “first step” into BIOENGINEERING and BIOTECHNICAL TECHNIQUES for SLOPES and STREAM BANKS.

Hopefully you interest is piqued.  Sign up for the Webinar now and also Professional Development Units.


FREE – Limited “Preview”  of  John McCullahs BIOENGINEERING AND BIOTECHNICAL SOIL STABILIZATION


This free course of the preview is only available for a limited time.

Weeks
0
0
Days
0
0
Hours
0
0
Minutes
0
0
Seconds
0
0

If you like the course and want to receive credit of 0.1 CEU, then enroll with DirtTime here, or IECA here.

Redding received over 10″ of much needed rain in January. But all that rain and the saturated soils led to a small slope failure on the Palisades Trail. You may remember the way we treated the “seeping” slopes two years back, with 2″ compost, native grass, mycorrhizae, all reinforced in Enka Mat and then sprayed with Flexterra (known as Green Armor System) Palisades Trail update

Well, we learned a few things at the last couple of Shasta College Summits, including some innovative uses for Compost Socks and how to use and install the Gripple Anchor System.  When Terry Hanson called and said there was a small landslide above the trail.  He informed us he had a CCC crew scheduled, very little budget, and another batch of storms were expects.  Dis we have any ideas, and could we provide a prescription. The College had some products remaining from the Summits we could probably donate, primarily in the form of Filtrexx Compost Siltsoxx and Filtrexx Compost Grosoxx and some Biaxial geogrid.  Terry had some 2010 Enka Mat.  Our prescription was to excavate the heavy failed clay material as feasible and then pack the slide face with Compost Socks.  The sock would be enveloped in Enka Mat and Geogrid and then anchored to the slope.  We decided to use the new Gripple Anchors (altogether we used about 45 anchors) system to anchor the materials to the slope and counter the outward forces.

It was fortunate that we had both green Siltsoxx (more designed for filtration) and the Grosoxx which are designed with more of a growing medium.  Since the slide area is still draining, the green socks may aide drainage while the black growsox may do a better job growing native grasses.  We will get to follow the project through time. 

PHOTOS WILL BE POSTED SOON 


Select your currency
USD United States (US) dollar